How to use Smash Forge for character hitbox/hurtbox and stage visualization
 Ruben - July 7, 2017
Smash Forge Tutorial & Set-Up Guide
A lot of people have been asking me about visualization of hitboxes and hurtboxes on Smash Forge and I decided to make this guide so anyone (with a decent graphics card computer) can do it, you need a Windows computer to do this (sorry Mac users) and you need 3 things on it:
- A dump of the game (google is your friend, there are some tutorials on how to get yours from your own console, it’s easy but it takes some time) regarding patch 1.1.7 and firmware 5.5.2 you can still dump the game as long as you can run homebrew, if you can load mods on your Wii U then you can dump the game
- Sm4shexplorer https://gbatemp.net/threads/sm4shexplorer-wii-u-only-for-now.416118/
- Smash Forge https://github.com/jam1garner/Smash-Forge/releases
If you have made a mod pack then you should have a dump and Sm4shexplorer, you can skip the sm4shexplorer setup section
Sm4shexplorer Setup
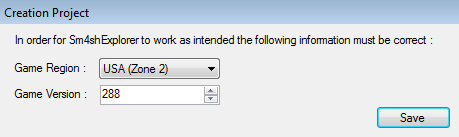
Once you have your dump you will have to extract the character and parameters files using Sm4shexplorer, the first time you open the application it will ask you to select the directory your dump is contained, select the vol folder (it should have a content folder in case it has a different name)

If the folder is valid it will show the following window, it should indicate version 288 for patch 1.1.6, version 304 for patch 1.1.7, if it’s another number then you have a previous patch files
Extracting the files
To load character’s models, animations and moveset data you need to extract the files contained on data/fighter directory, you can select a specific character you want to check and extract the files by right-clicking the character folder and selecting extract as shown here
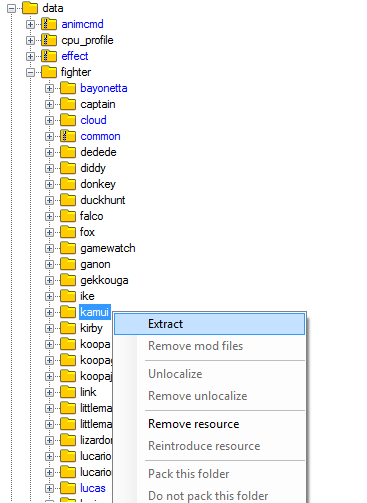
You can also do this on the fighter folder to get extract all characters but it might take some time
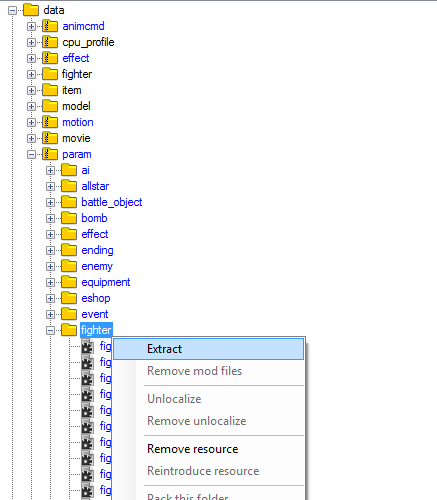
Hurtboxes and most intangibility frames data are written on parameters files, those are contained on data/params/fighter, you can extract the folder directly since the files aren’t as large as character models
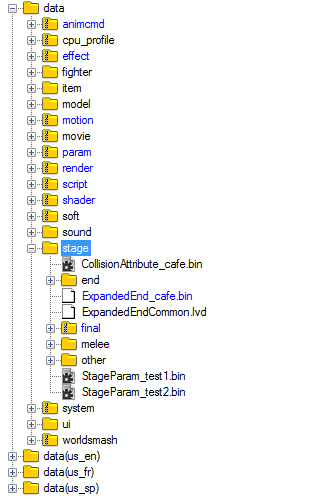
If you are interested on stage data you can extract them on the data/stage directory, there are two folders that can be extracted:
melee: Contains all stages files (models, parameters, animations)
end: Omega versions
Your files should be located on the sm4shexplorer executable directory on the extract folder
Important note: You can modify this files with your dump unaffected, this files as separate from the dump files and mod workspace
Smash Forge
Note: on this section some pictures can look different to the version of Forge you are using, the pictures shown are from the current version available when writing this guide
If Forge crashes when loading a model then your graphics card has issues with the renderer
You can remove all files currently loaded on Forge with File/Clear Workspace
Settings
On Forge there are settings to change some visualizations, but it also has some important stuff for correct hitbox visualization
On the menu click View/Render Settings which will show the following window
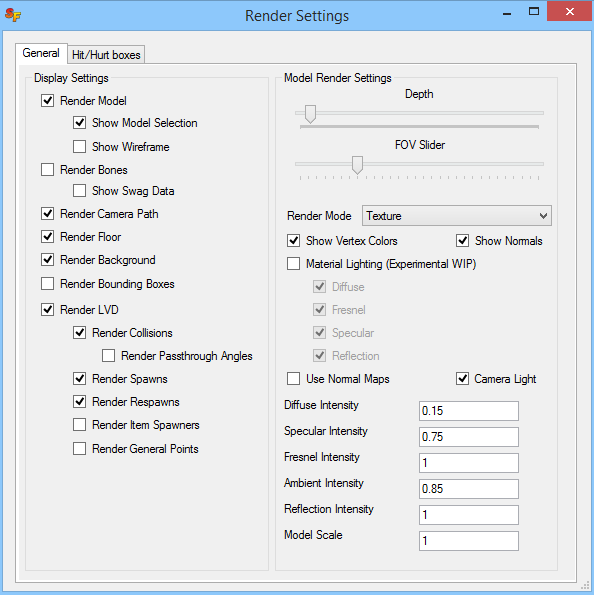
A brief description of the left settings
- Render model: Shows character/stage models
- Show model selection: Selecting a mesh on mesh list will display it on white on renderer
- Show wireframe: Show the model wireframe
- Render bones: Show character bones (used on animation, blue lines and green dots)
- Show Swag Data: Show more info about bones (currently not used ?)
- Render Camera Path: Used on stuff with camera animations
- Render Floor: Render the floor shown on the renderer window
- Render Background: Render the gradient background (it can be customized by changing config.xml file), when disabled background is black
- Render Bounding Boxes: Shows model bounding boxes
- Render LVD: Enables stage rendering
- Render collisions: Render stage vertexes and lines
- Render Passthrough Angles: Render the angle a stage collision has
- Render Spawns: Render spawn positions (blue cube)
- Render Respawns: Render respawn positions (blue cube with a triangle below)
- Render Item Spawners: Render location where items can spawn
- Render General Points: Render points that are used for some stuff (like some Final Smashes position; example: Ike, Ness/Lucas, Olimar)
- Render collisions: Render stage vertexes and lines
The right part is about render settings like lightning effects and FOV which aren’t important for visualizations EXCEPT Model Scale
On the Hit/Hurt boxes tab
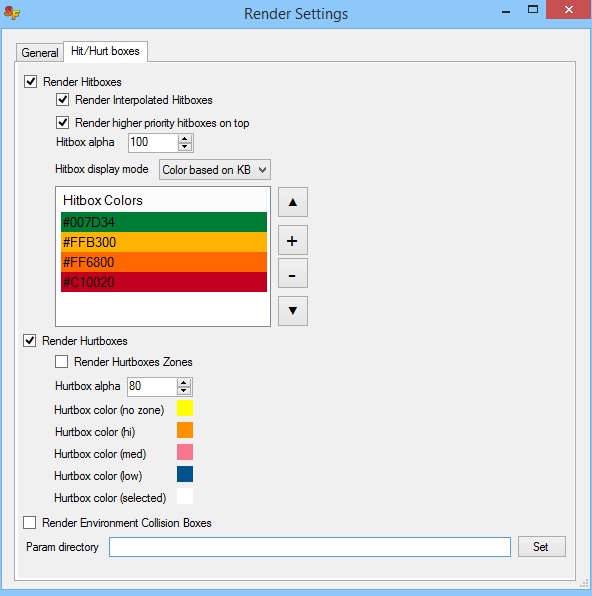
- Render Hitboxes: Show hitboxes on animations
- Render Interpolated Hitboxes: Shows interpolated hitboxes based on the previous animation frame (gray colored)
- Render higher priority hitboxes on top: Hitboxes with lower ID (higher priority) color will be drawn last so their color isn't mixed with lower priority hitboxes
- Hitbox alpha: Alpha value of the color used on hitboxes (Lower = more transparent)
- Display mode: You can select between displaying all hitboxes with red color, change the color of the hitbox be based on the hitbox KB done at 160% on a 100 weight character or color based on hitbox ID, you can change or add colors too
- Render Hurtboxes: Shows character hurtboxes
- Render Hurtboxes Zones: Hurtboxes color change depending on the zone: High, Mid or Low (used for Damage animations)
- Hurtbox color: Change the color of the hurtboxes when no zone is selected and for each zone, selected is for wireframe color used on selected hurtbox on Hurtbox List
- Hurtbox alpha: Same as hitbox alpha but with hurtboxes lol
- Render Environment Collision Boxes: Show bones position where a character detects collisions with stage/blast zones
- Param directory: Put the path where data/param is located on your computer, when opening a character it will try to find and load their parameters file
About Model Scale, you need to set it to 1 when viewing stages and when opening characters you need to input manually the value the game scales the character model
Go to Meshima’s Smash 4 params spreadsheet https://docs.google.com/spreadsheets/d/1FgOsGYfTD4nQo4jFGJ22nz5baU1xihT5lreNinY5nNQ/edit?pref=2&pli=1#gid=706249581
On fighter_param go to column 44 which is Character Size multiplier and use the value for the character you will use, you must change this value before opening the model
Use File/Save Config to save your current settings so they are used when you start Forge again
To change some settings of the viewport you need to change config.xml manually like background and floor texture
In this example, changed the background by back_gradient_top to #DADADA and back_gradient_bottom to #9D9D9D
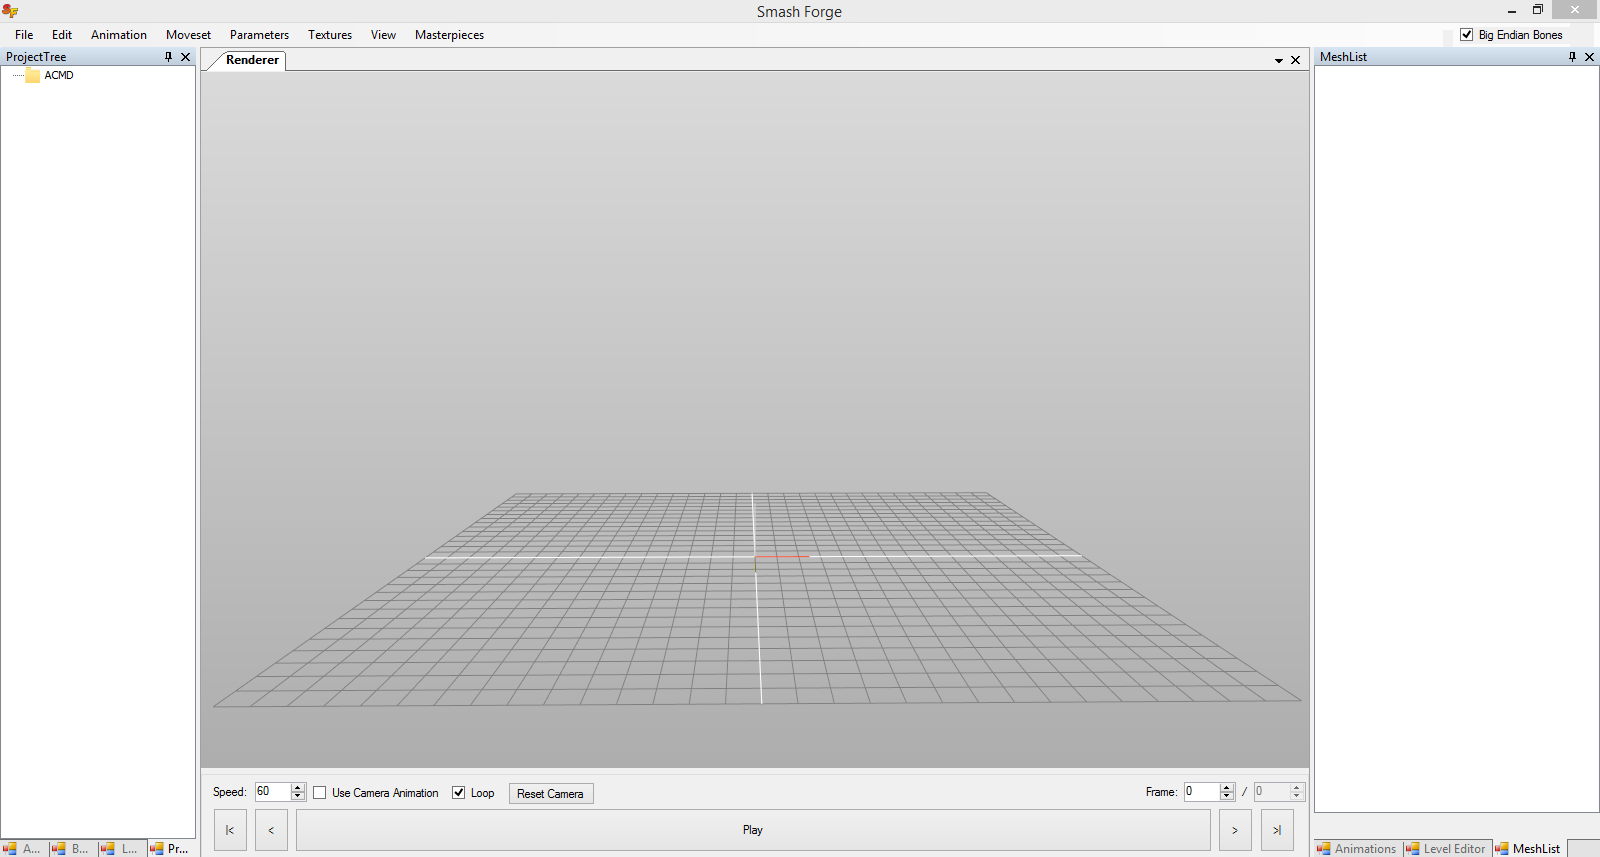
Renderer controls
When the renderer is selected
- Move camera: Right-click and move mouse
- Rotate camera: Left-click and move mouse
- Zoom: Scroll up/down or use the up/down keys
- Screenshot: Press the P key, saves as Render.png which is saved on Forge executable directory
Update: Camera position control
Sometimes you need the camera be positioned on a exact position for comparison, but Forge can sometimes move the camera and is difficult to set it to the previous position using the mouse controllers
Thanks to @StruzSmash you can now set camera position, rotation and zoom using the Camera Position window that can be opened by clicking the Camera menu
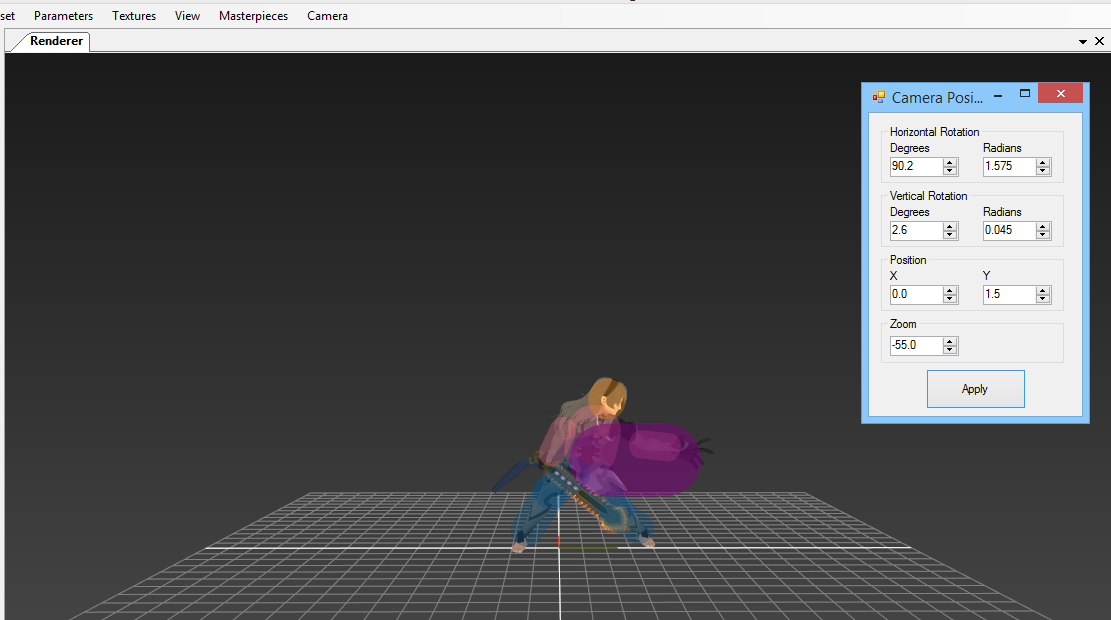
Simply put the values of horizontal/vertical rotation, position and zoom values and press the Apply button to update the camera on the renderer
Opening a character
After setting Model Scale setting, on the menu select File/Open/Open Character to open the folder dialog and select the character folder from data/fighter you want to open (it must contain model, motion and script folders) Forge will load all files using the first character texture
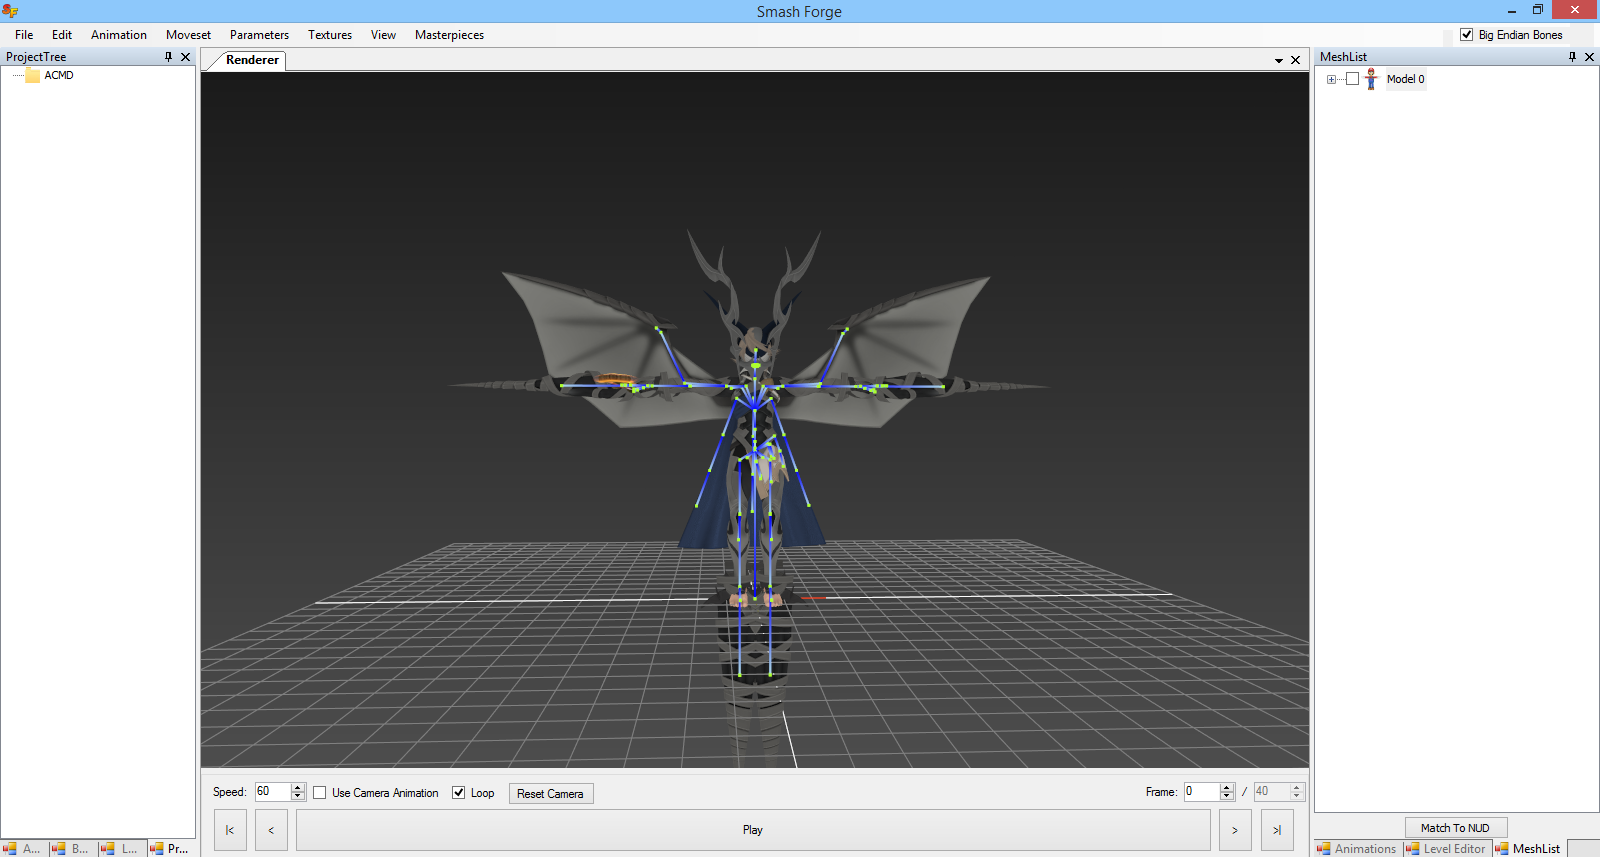
Wait but it is male Corrin and it has wings and spears, Cloud has two swords, character eyes are weird, [insert any similar comment regarding model meshes and textures]
For character textures you can:
- Change the texture folder you want to use to c00 (you can remove them or rename the current c00 folder)
- Load model, animations and moveset separately (Using File/Open/Open File, Animations/Import and Moveset/Import) selecting character model.nud file, on motion folder body/main.pac and on moveset script/animcmd/body/motion.mtable files)
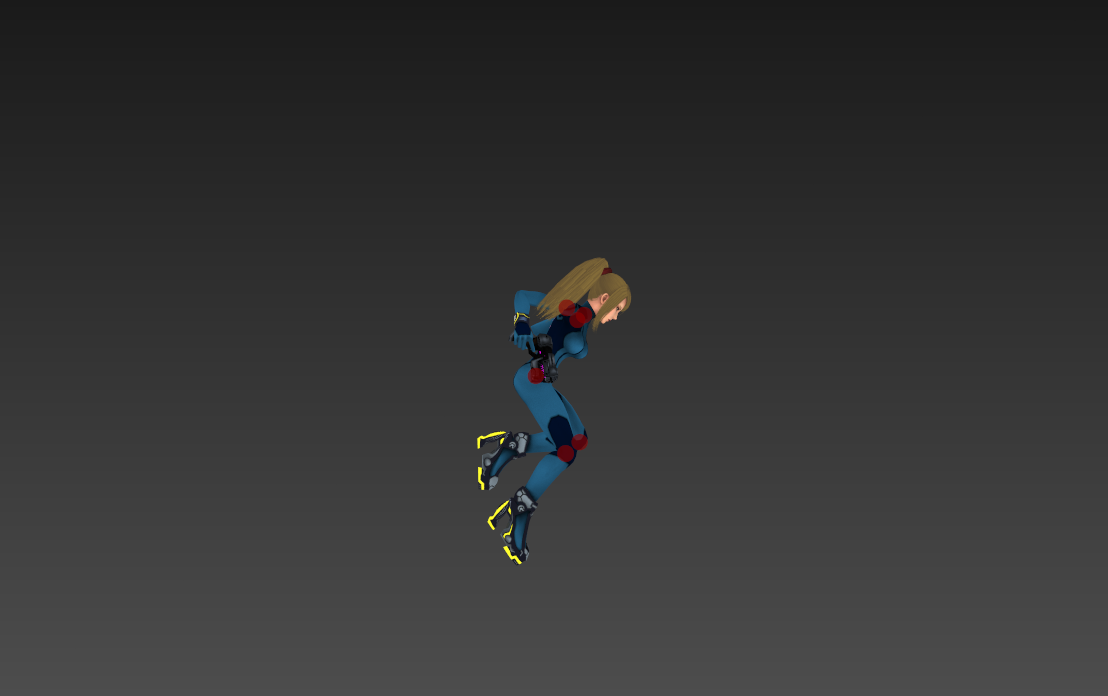
Blue lines and green dots are the bones rendering, disable it on Render Settings
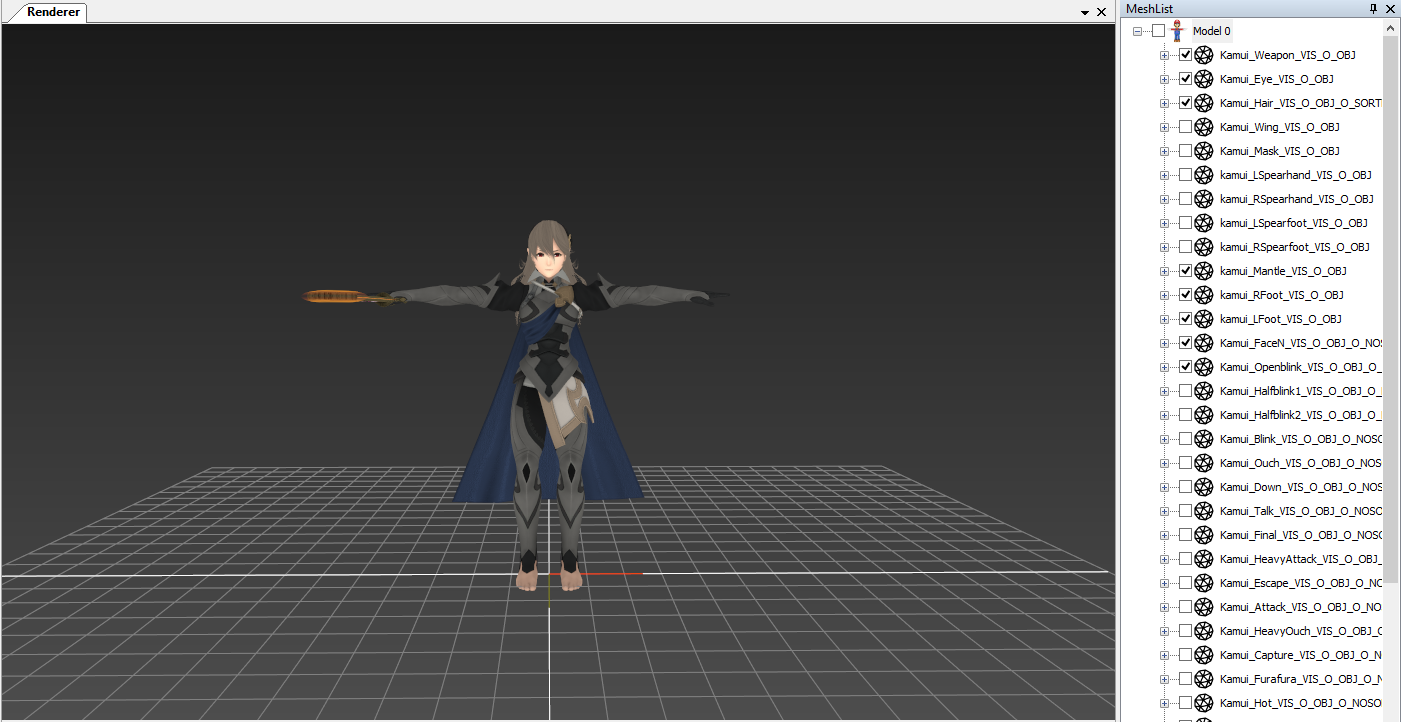
For the weird meshes go to Mesh List and expand the model’s list
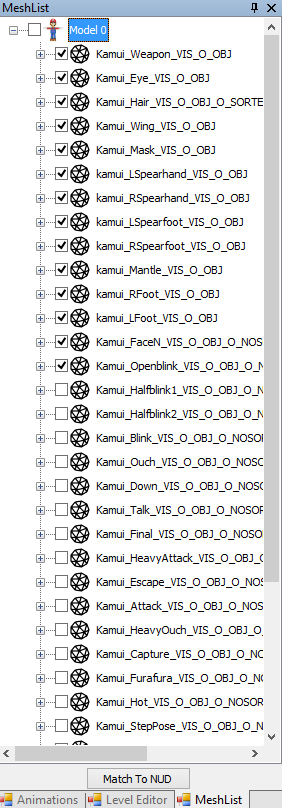
Then uncheck those meshes that are unnecessary or you don’t need (you can enable them if you need them for a visualization)
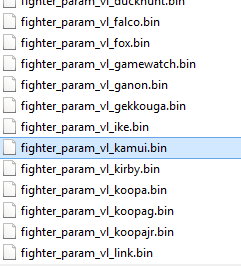
For hurtboxes and intangibility frames you need to import character’s parameters files using the Parameters menu and selecting Import, select from data/params/fighter the fighter_param_vl_xxx.bin file, xxx is the character name that you loaded or you want to load (can be done before opening character)
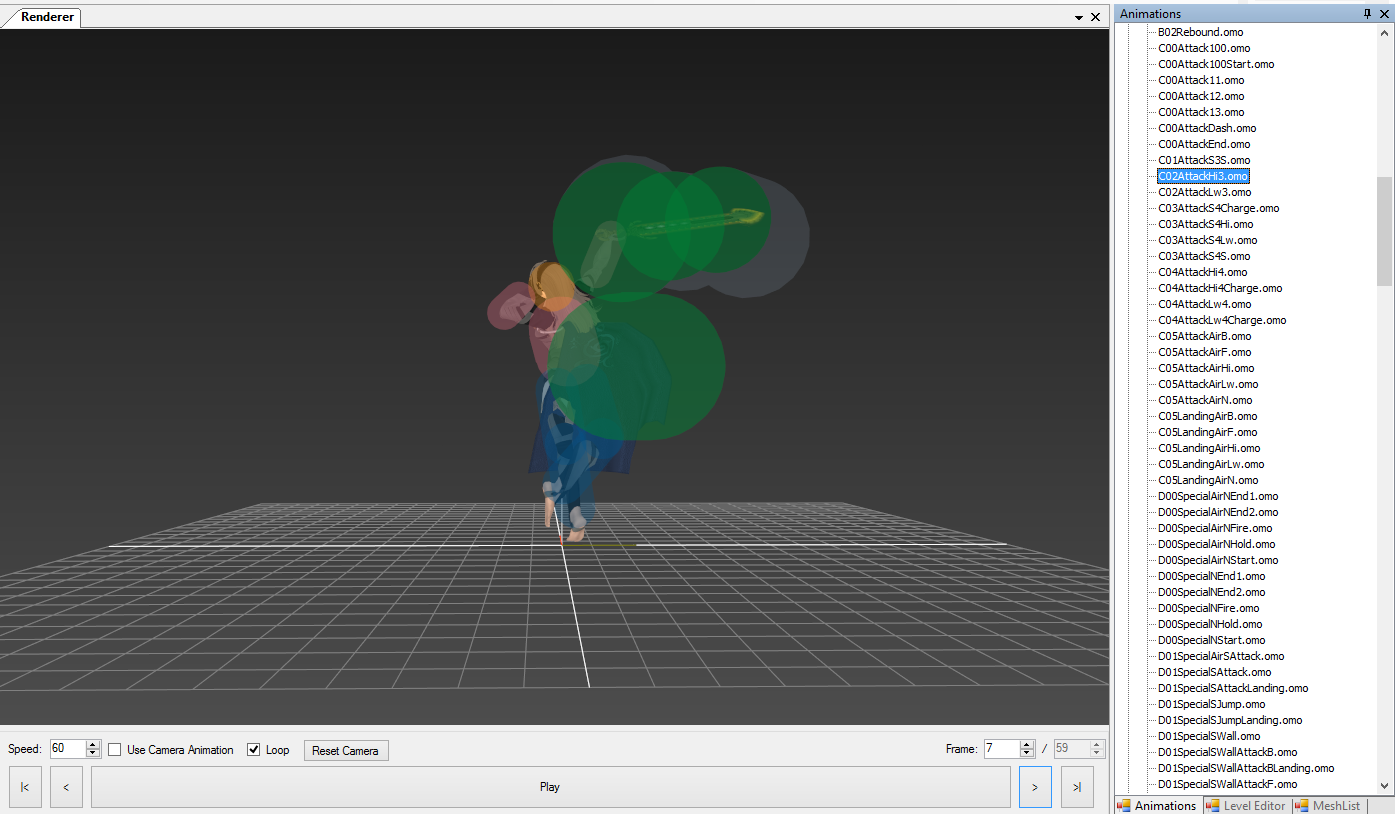
Character hurtboxes should now be displayed when the model has been loaded, on this version hurtboxes are displayed light blue, but if hurtbox zone rendering is enabled then it should render them orange for Hi zone, purplish pink for Mid/N zone and light blue for Low zone, these are used for Damage animations

Now go to the Animations window and expand the Bone animations list, then select the animation you want to see
Use the controls on the renderer to adjust frame speed, play the animation or go to a specific frame
Frame speed modifiers and FAF as animation length
Animations on Forge aren't affected by frame speed modifiers declared on game scripts which are used to make animations faster or slower, when comparing hitboxes it might give some inconsistencies like this

Hitboxes for Bayo's jab 1 appear on frame 13 on Forge, yet it's active starting frame 9 in-game. This is caused by the frame speed multipliers and to make Forge consider them on animations you need to check the Frame speed modifiers checkbox that is found below the frame counter
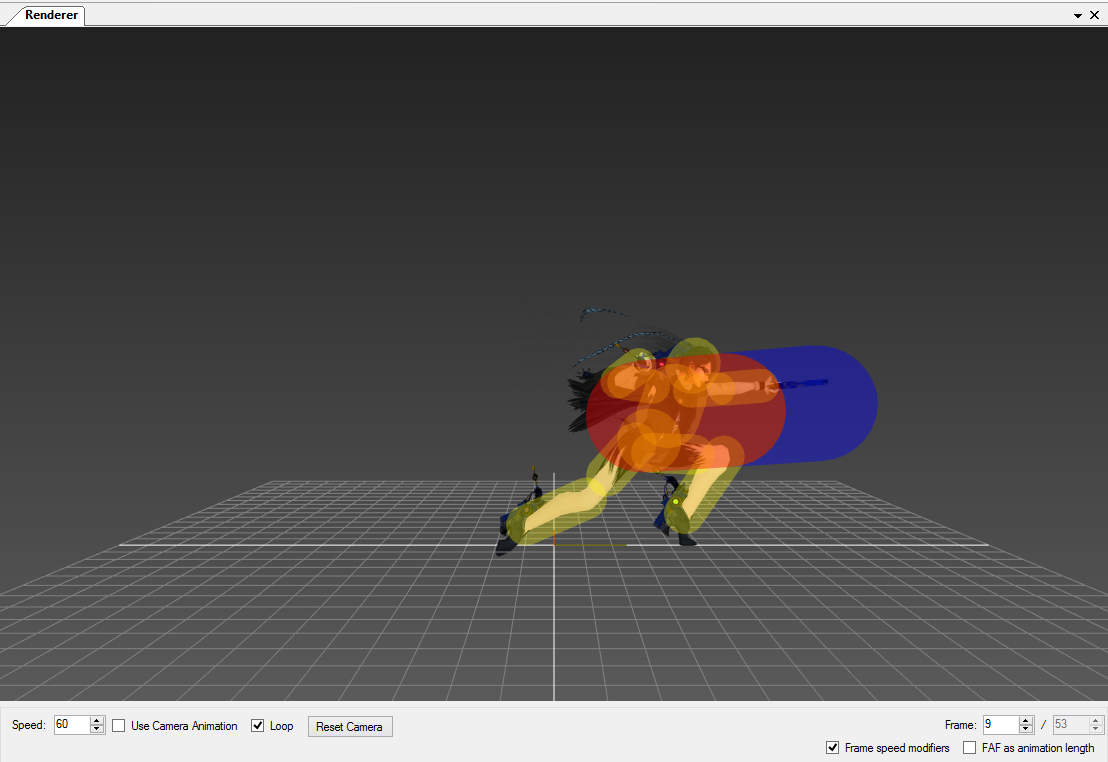
With this animations frames will play as if they were done in-game. The FAF as animation length option changes animation's length into their FAF frame (if they have one)
Some notes about visualization
- Hurtboxes become white when they are invincible, they disappear when the character is intangible, hurtboxes will be displayed purple when the character has super armor
- Hitboxes are colored blue when they are windboxes, purple for grabboxes, orange for searchboxes, black for spike hitboxes regardless of custom hitbox colors
Environment Collision Boxes visualization
Environment Collision Boxes (also known as ECBs) are 6 spheres attached to a character, these control collisions between other characters and stages, the height of your name or player tag and the area the character can be footstooled, as you can see on the following video which has a modded ECB position
On Forge you can visualize them after importing character parameters by enabling the setting on View/Render Settings -> Render Environment Collision Boxes
Weapon visualization
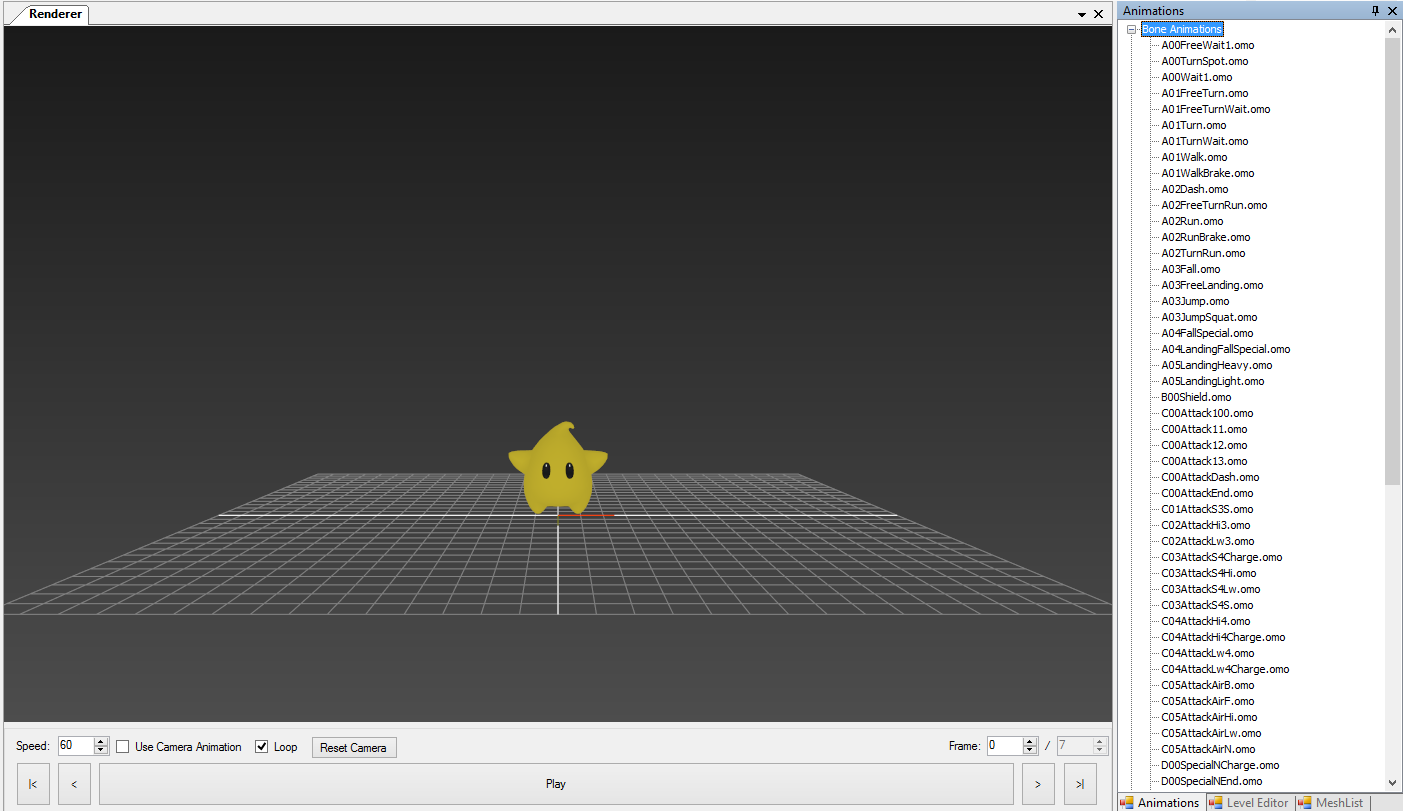
Some weapons like Luma and Pikmin which aren’t attached to the character can be visualized on Forge, you can load them by opening the weapon model.nud file on the model folder using File/Open/Open File, import the animations click on Animations/Import and select the motion/weapon name/main.pac file (for Pikmin regardless of color animations are on the y folder), and Moveset/Import go to script/animcmd/weapon/weapon name/motion.mtable (if the weapon doesn’t have a folder here then it doesn’t have hitboxes attached)
Hurtboxes of weapons that have them can’t be visualized but hitboxes can

Notes:
- Some weapon hitbox visualization don’t work properly so it might show weird stuff (for example Corrin’s Fsmash, a hitbox is set here but it’s relative to Corrin’s model not the spearhand)
- Luma’s color changes each frame, to avoid epilepsies avoid playing the animation unless you edit the model’s textures so they only have one color
Manually setting game script to animation
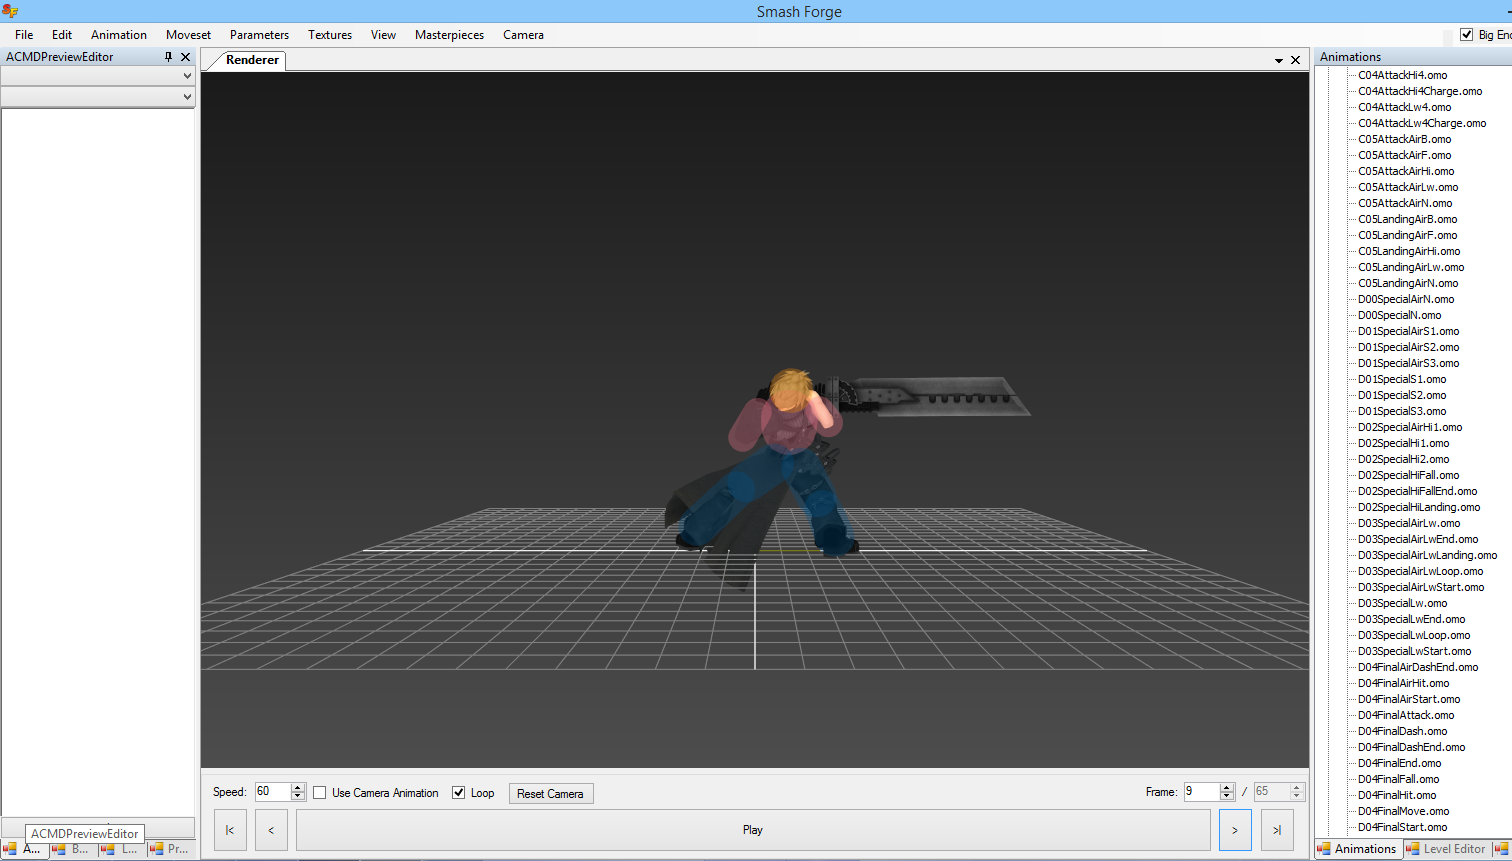
Smash Forge uses animation's name (without the prefix X## and file extension) on lowercase CRC32 hash to look for the animcmd game.bin scripts (animation moveset scripts: where hitboxes and some stuff are declared), however some animations name don't match the hash the scripts have so hitboxes cannot be loaded or a single animation is used on multiple scripts (like custom specials, Limit Break, charged specials)
In this example I will use Cloud's Climhazzard which animation is SpecialHi1, if you try to play the animation you will notice that no hitboxes will appear, this is because of the hash mismatch, so manually setting the game script hash is required. First open the ACMDPreviewEditor which is found on the left part, you will notice that the first combobox is blank or has the name of the previous animation (if you selected one before switching to an animation with this issue)
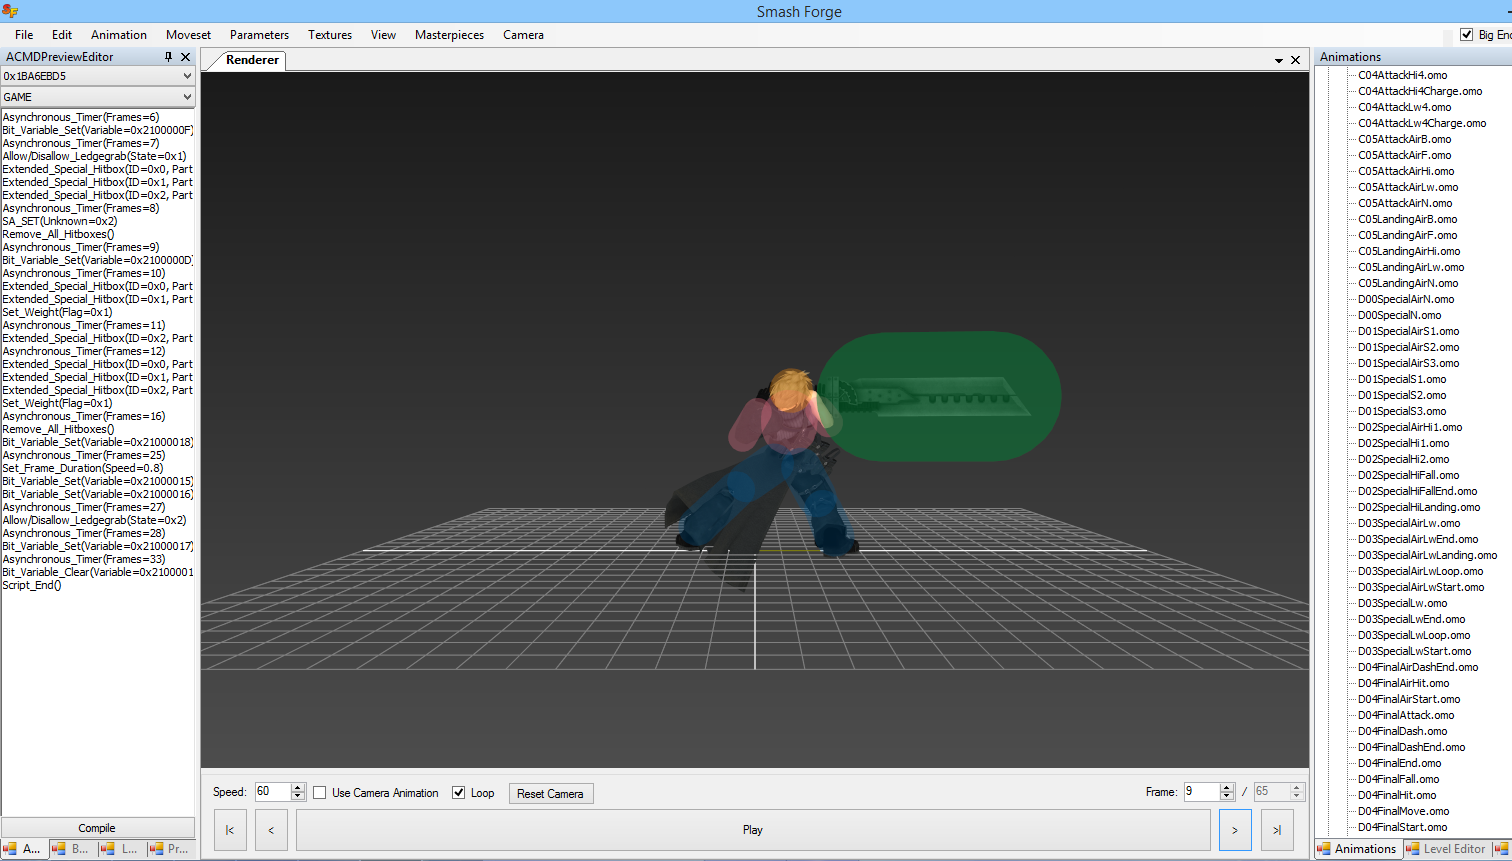
First select on the second combobox the option GAME, this will load game.bin scripts which contain hitboxes, the others are scripts that manage expressions, sound and effects. Then you need to look for the animation script that contains the hitboxes of the move
How to do that? Well... on the first combobox some scripts will have the animation name followed by the hexadecimal hash, usually you can find the script by looking between animations that are close to the one you are looking, in this case Cloud's SpecialHi2 (Climhazzard's descend hit) name will appear there, since it's below SpecialHi1 then it should be above it, checking the script hitboxes and comparing damage, angle, BKB, KBG with hitbox data on KuroganeHammer
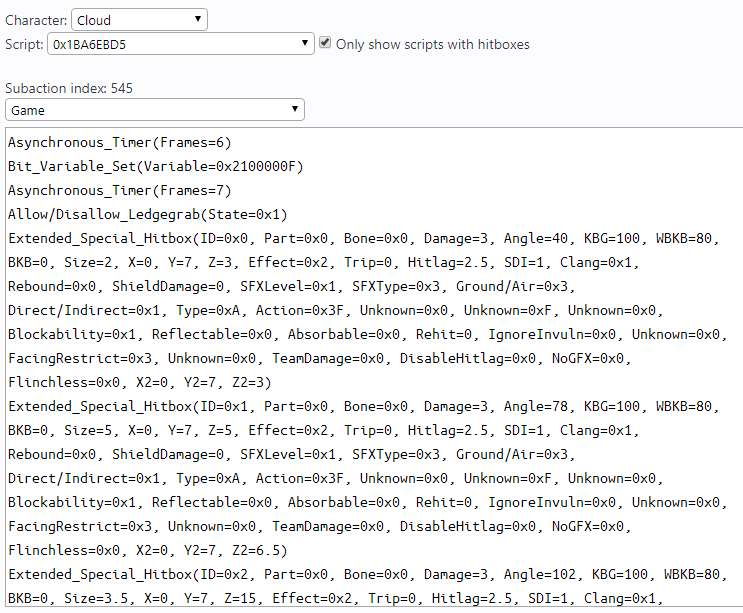
However sometimes scripts can be empty and people have trouble reading them due to hexadecimal values (convert angle, bkb, kbg, wbkb values from the script) so you can use the script viewer from Sm4sh Calculator http://rubendal.github.io/Sm4sh-Calculator/scripts.html which already has filtered the scripts to show by default scripts with hitboxes and show the values on decimal, from there get the script hash value (the one in the combobox) and look for it on Smash Forge script hash list
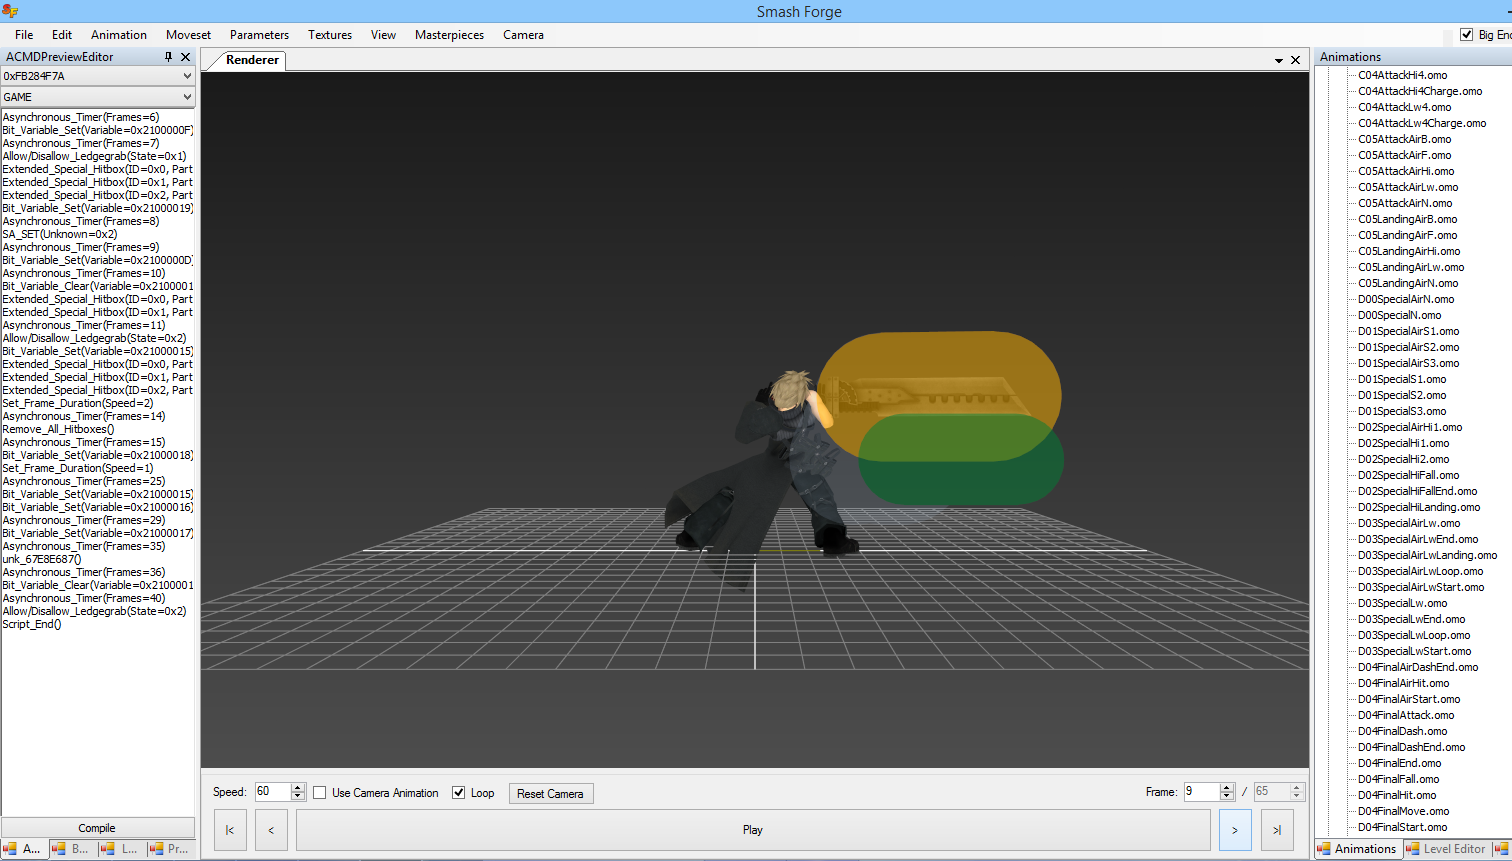
But wait, what about Limit Climhazzard? well Custom specials, Limit Break, True Ryu specials and fully charged moves scripts are immediately after the uncharged/normal version of the move, so just select the next scripts and check the hitbox data
Opening stages
You have probably seen that there is an option to open stage similar to open character on File/Open… don’t use it lol this option loads ALL the models as well as animations and lvd file, well better look at the next picture when using it to open Lylat

All models used on the stage (background, stage, platforms) is set on the center, sometimes running all animations can move stuff to their proper place but the program isn’t perfect so it can cause issues and you would have to disable each models meshes manually
Instead just use File/Open/Open File, open the stage folder you want to open from data/stage, go to param folder and open the lvd file
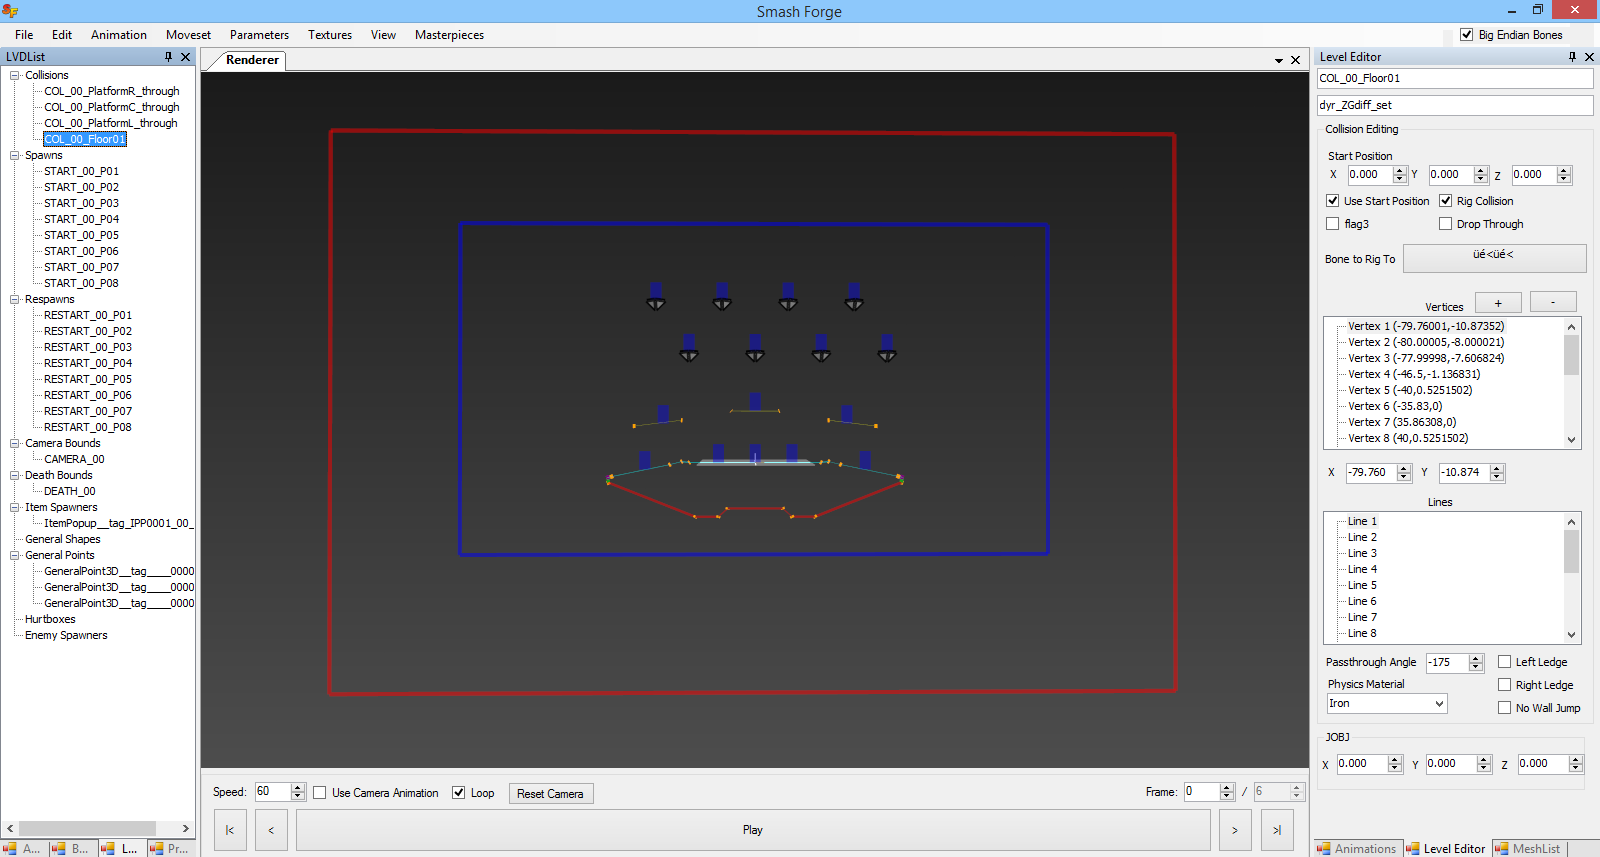
On the left side window, you can switch to the LVDList to check the list of collisions, spawns, respawns, camera bounds, blast zones, item spawners and general points, on the right side window you can use the Level Editor to see selected items data such as vertex position, line material, line flags and blast zones vertexes.
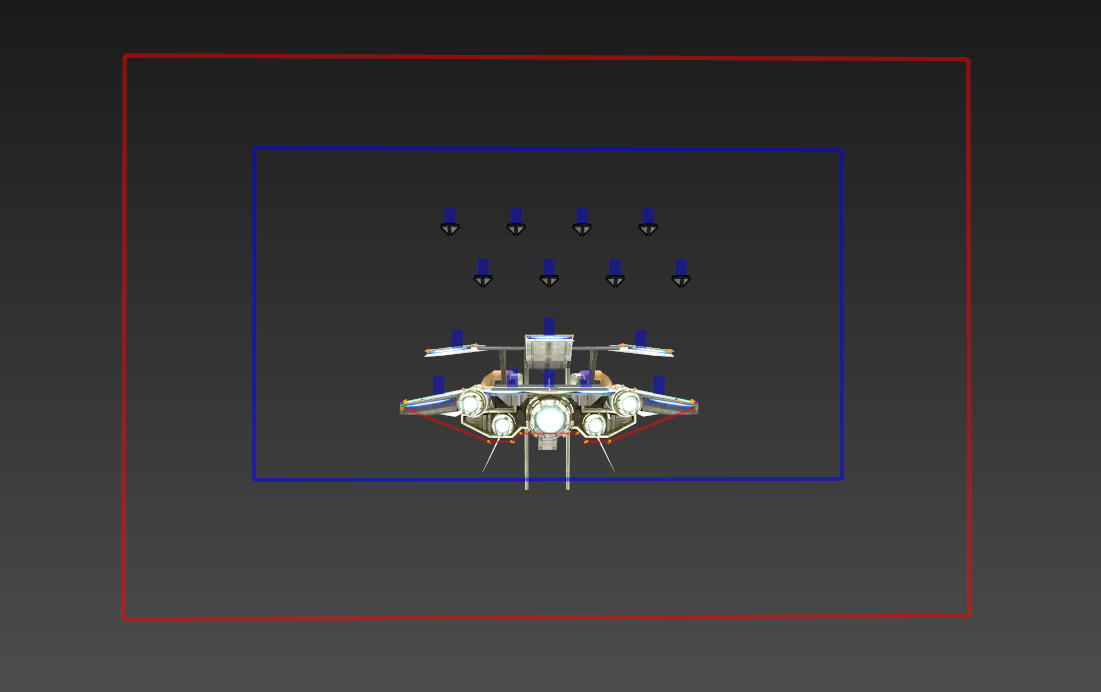
To load the stage models you need to use File/Open/Open File and select the stage model from the model folder, sometimes you must guess the name (for example on Lylat stage model is on the dyr_ZGdiff_set folder) but sometimes there are other models that can be identified (like Smashville’s spectators), for animations use Animations/Import and select the animations you want to load from the animation folder
Well I think that should cover up the basics on using Smash Forge to visualize character animations hitboxes and hurtboxes as well as stage data
Thanks a lot to @jam1garner for making Smash Forge and to everyone who is contributing on its development
This blog post was written by a SSB World community member. Share your Smash 4 knowledge by creating your own blog post now.
You must log in to comment.


Comments