The Ultimate Sheikah Encyclopedia: How To Play Sheik in SSBU
The Ultimate Sheikah Encyclopedia
A Synthesized Guide to Sheik in Super Smash Bros Ultimate
by HL | Contrary and the Sheik Community
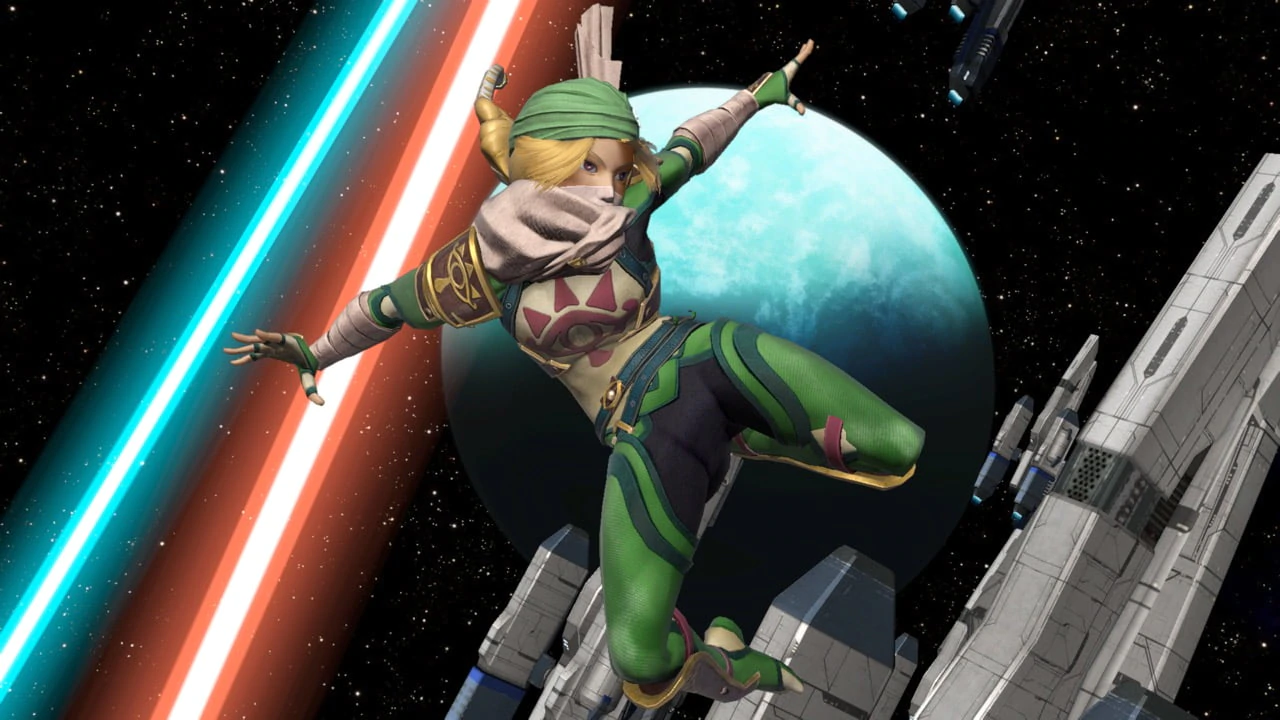
"They say that, contrary to her elegant image, Princess Zelda of Hyrule Castle is, in fact, a tomboy!" — Gossip Stone, Legend of Zelda: Ocarina of Time
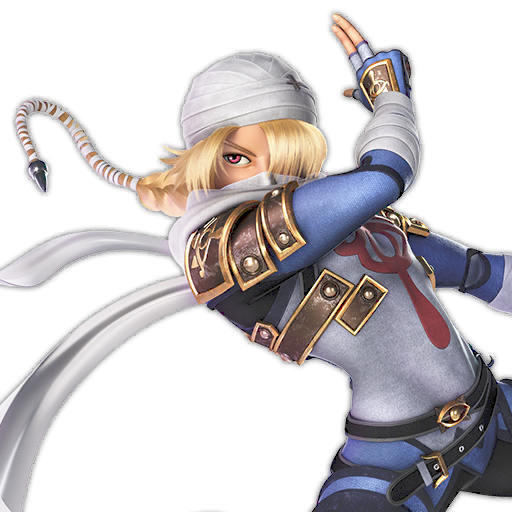
Sheik, the alter ego of Princess Zelda, is a fierce, nimble, and mysterious warrior from The Legend of Zelda: Ocarina of Time. Combining the years of combat experience with the sacred power of the Triforce of Wisdom, her agility, versatility, tactical prowess are largely unrivaled.
Offensively, Sheik is a fast, agile character, boasting superior movement, zoning, and combo abilities. While she has few strong kill-moves, she can rack up damage insanely quickly, damage enemies without substantial risk, move incredibly quickly, and recover very effectively.
Defensively, she may be the safest character in the game. Her superior frame data, mobility, and projectiles incentivize the opponent to approach and allow for an unrivaled neutral game. If she ever wants to sit back and observe or maintain the lead, she is free to camp with needles or turtle, walling out the opponent out with aerials. Her only true flaws are her lack of easy kill options, relative proneness to trading damage, light weight, and tendency to be “combo food”.
While she is one of the most difficult characters to learn, her abilities grant her some of the most creative freedom in the game and tools for almost every situation. In this guide, you will be provided with every bit of information that you’ll need to become a competent Sheik player.
This guide draws from a variety of sources, including Discord, Smashboards Forums, Smash Bros Subreddits, YouTube Channels, and direct advice from ranked players. A particularly large contributor to this guide was _Tree, who has since retired from Smash Bros content creation. If you have any questions or suggestions, please contact me via Twitter (@HL_Contrary). You can view the source Google Document here.
My goal is to make the Ultimate Sheikah Encyclopedia the definitive online resource for Sheik in SSBU, providing basic information for beginners alongside more advanced information for established players in the competitive scene. Once completed, this resource should provide up-to-date, in-depth information on Sheik’s character properties, moveset, combos, movement options, advanced tech, neutral game, advantage/disadvantage states, ledge-guarding options, kill set-ups, stage preferences, and character match-ups.
Chapter 1: Sheik’s Moveset
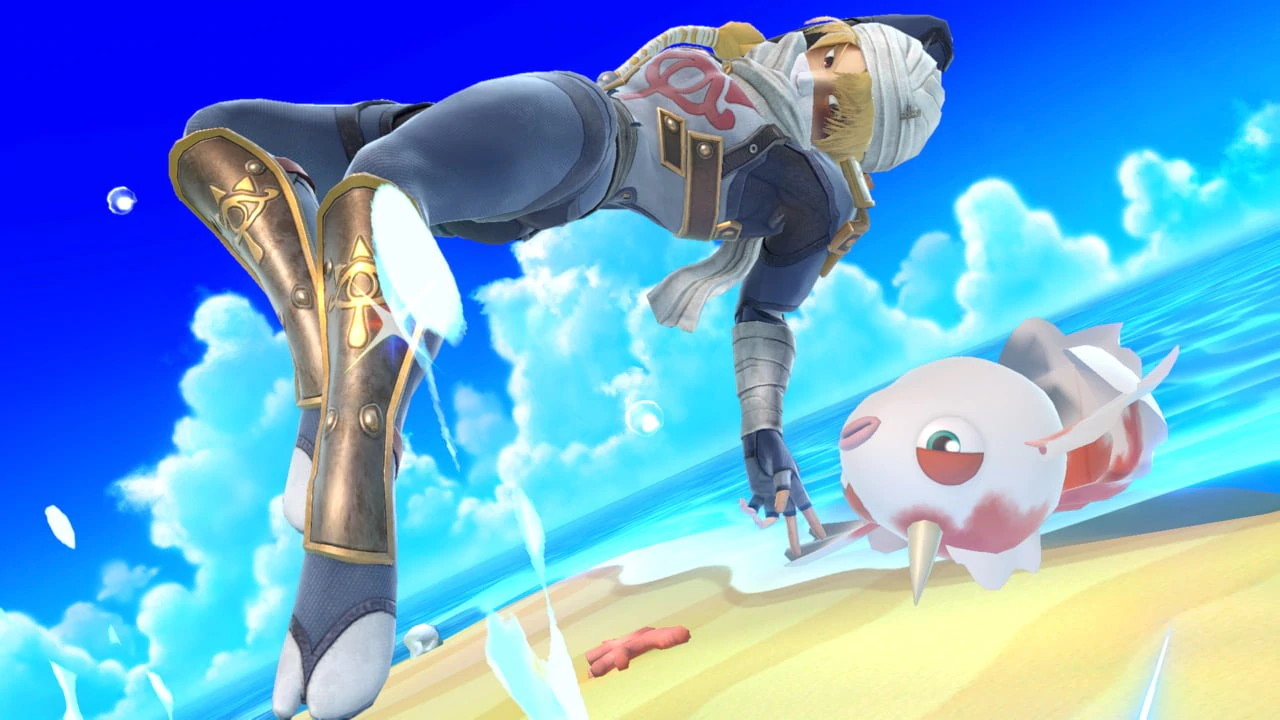
1.1: Normals
At low percent, Sheik’s normals set up for her high-damage bread-and-butter combos. At higher percents, they begin to grant stage control and set up for kill confirms.
Jab: Shadow Jab
A series of punches, finished by a strong blow. The first two punches might still be great for setting up into grabs and other normals. The flurry of punches is good for shield poking and resetting neutral. A perfect “get off me” move and great for hindering grabs and resecuring stage control.
Jab 1: 2%, Frame 2-3, FAF ?.
Jab 2: 3%, Frame 2-4, FAF ?.
Rapid Jab: Variable %, Frame 4, 9, 13, 17, …
Final Hit: 3%, Frame 5-6, FAF 53.
First Observations:
- Appears to still be a Frame 2 move
- Can still be mixed up into a tilt or grab
- The hits of jab appear to link together better
- It appears that the final hit of multijab will crossup shield sometimes?
Dash Attack: Sheikah Strike
A running strike at the feet of the foe, shifting Sheik’s hurtbox slightly. It is mainly used as a small reactionary punish and as a method to gain fast stage control. It can also be used to cross up shields, if need be. It tends to be most useful when cancelled into a grab.
Early Hit: ?%, Frame 5-6.
Late Hit: ?%, Frame 7-8, FAF 41.
First Observations:
- Appears to do slightly more knockback, but could just be the new knockback formula
- Still a good way to punish landings
- Still no combo potential
- Unsure if DAC Grab still exists
F-Tilt: Spinning Kick
A swift kick, covering a great amount of space. It is great for racking up damage, starting combos, and punishing aggressive movement. This works particularly well out of a dash cancel. It combos into aerials very well and can even setup kill 50/50 scenarios.
Hit: ?%, Frame 5-8, FAF 30.
First Observations:
- Seems to be the same old move, but a slight bit slower
- Conversions off F-Tilt seem possible at most percents
- 50-50 setups will likely be important
- Spamming tilt may be worse, due to additional movement options
- Dash cancels into F-Tilt will be broken
- Low percent tilt combos seem possible
- Definitely not safe on shield
- Same frame data
U-Tilt: Split Kick
A stretching kick, reaching high above Sheik, and sweeping out two hits. An amazing anti-air and combo extender. It can also provide platform pressure and reset opponents if they miss a tech.
Hit 1: 5%, Frame 5-8.
Hit 2: 6%, Frame 19-23. FAF 36.
First Observations:
- New Knockback may make it worse at comboing into Bouncing Fish
- Might be a good combo extender now
- Same frame data
D-Tilt: Sweeping Kick
A stealthy leg-sweep, knocking an opponent upwards while reducing Sheik’s vulnerability. A set-up for kill confirms and a great spacing option. It serves a similar purpose to F-Tilt, allowing for low-commital kill setups and extending combos. Both the sour spot and sweet spot have utility. It is particularly great at punishing ledge hanging, allowing for early kill confirms.
Hit: ?%, Frame 5-6, FAF 26.
First Observations:
- Still can two-frame
- Same frame data
- Still sets up into 50-50s and aerials
- Low percent tilt combos seem to still work
- Might be safe on shield from max distance?
1.2: Smashes
Sheik’s Smash Attacks all have situational uses, but they are almost never the safest option in her kit, as they are laggy and hard to hit.
F-Smash: Rushing Kick
Two strong kicks in quick succession; one of Sheik’s strongest horizontal punishes. Risky to use, but kills at reasonably solid percents near the edge. Good for punishing landing and spot-dodges.
Hit 1: ?%, Frame 12.
Hit 2: 8%, Frame 20, FAF 50.
First Observations:
- Both hits appear to connect more easily.
- Seems slightly faster and stronger.
U-Smash: Sheikah Salute
The Sheikah Salute, symbolizing strength through unity. Two strong overhead strikes meet together at the tipper for devastating knock back. Hard to land, but easily the strongest kill move in Sheik’s onstage arsenal. It will sweetspot on most platforms. This move is phenomenal for punishing both landings and jumps. Might no longer have invincibility, but it still kills very early.
Hit 1: %, Frame , Arm Intang. Frame .
Hit 2: %, Frame -, FAF .
First Observations:
- Very strong still. Potentially stronger?
- Amazing with the new dodge mechanics, as it can truly punish landings.
- Hitbox seems longer for non-sweetspot?
- Dash Cancel U-Smash is gonna be huge for ending stocks
D-Smash: Whirlpool Kick
A stealthy, spinning maelstrom of kicks, covering a large segment of the ground. This attack shrinks Sheik’s hurtbox and is mainly good for punishing rolls and dodges. It has surprisingly large knockback and is faster than other Smash Attacks, so it’s a decent enough option at higher percents.
Hit 1: %, Frame , FAF .
Hit 2: %, Frame .
First Observations:
- The hitbox looks more generous than Smash 4
- It's still probably just going to be used for punishing whiffs and rolls.
1.3: Throws
Sheik’s Throws might not be as broken as they were in Smash for Wii U, but they still grant some follow-ups at lower percents and give you back a lot of stage control. They seem to be significantly less useful at higher percents and will rarely realistically grant a kill. A grab is easiest to land when preceded by tomahawk jumps or low-knockback moves… or extended with a DAC, Roll Cancel, or pivot.
Grab
Standing Grab: Frame ?, FAF ?.
Dash Grab: Frame 8-9, FAF ?.
Pivot Grab: Frame ?, FAF ?.
Pummel: ?%, Frame ?.
Grab Release: FAF ?.
First Observations:
- The apparent inability to run through shields makes pivot grabs worse
- Grab game will still be important in SSBU, but there will be less Grab > Imagination
- Lower hitstun means grabs will have fewer followups
- Grab clashing might make it even harder to convert
- Standing grab still seems kinda bad
- Can be a follow up off of low knockback moves at early percents!
- The future of Sheik’s grab game might just hinge on frame trapping air dodges.
- On mashing opponents, try to pummel once per ?% damage on the opponent.
F-Throw: Zora’s Cast
An impassioned cast forward, imitating the graceful Zora race. This often guarantees a Bouncing Fish or series of aerials at low percents.
Hit: %, FAF ?.
First Observations:
- At very early percent, proper DI seems to make Bouncing Fish not work
- F-Throw > Bouncing Fish works sometimes
- F-Throw > F-Air/N-Air still works
- The future of Sheik’s grab game might just hinge on frame trapping air dodges.
B-Throw: Rito’s Rebuke
A violent backwards toss, reminiscent of the proud Rito race. This is best utilized as a DI mix-up or a way to finalize stage control, occasionally resulting in Reverse Bouncing Fishes and edge guards.
Hit: %, FAF ?.
First Observations:
- Undetermined potential as a DI mixup. Will likely just be used for throwing offstage.
U-Throw: Deku’s Launch
A simple vertical launch, reminiscent of the gentle Deku race. Usually a bad option. Unknown combo potential in Ultimate.
Hit: %, FAF ?.
First Observations:
- This might finally be a kill throw at very high percents! There are reports of killing midweight characters while on platforms.
D-Throw: Goron Stomp
A brutal trampling stop, reminiscent of the mighty Goron race. A good setup into U-Air and Vanish at early and mid percents, though its use as a kill confirm is very, very situational.
Hit: %, FAF ?.
First Observations:
- Unknown combo potential. If it allows for follow-ups, F-Throw likely outclasses it for comboing and frame trapping.
- Might be useful for getting the opponent in a bad position and un-staling U-Throw.
1.4: Aerials
Sheik’s glorious combo game is almost entirely the result of her aerial moves. Almost every kill that you get on your opponent will involve being off the ground. Beware of staling these options around kill percent! Refreshing these moves with pummels, normals, and needles is your friend.
Hit: %, FAF ?.
N-Air: Lunge Kick
A sleek, long-last kick in the air (a.k.a. sex kick). An amazing anti-approach, OOS, and spacing tool. Sheik’s fastest aerial. It can also negate a lot of weak projectiles. When utilizing the late hit, it becomes a deadly setup into Bouncing Fish. It also makes her ridiculous ledge trapping possible. The strong hit and the latest weak hit can be used to make Nair safe on shield.
Early Hit: ?%, Frame . Lag . AC .
Late Hit: ?%, Frame , FAF .
Early Observations:
- Still combos into Bouncing Fish
- Still a sex kick, which allows for great combo extensions, finishes, anti-airs, edge guarding, and ledge trapping.
- Still a great combo finisher
- N-Air > Bouncing Fish still works
F-Air: Sheikah Slash
The signature attack of the Sheikah clan, utilizing precise strikes to vulnerable areas. The definitive aerial combo move, allowing a transition to any number of follow-ups.
Early Hit: ?%, Frame , FAF . Lag , AC .
Late Hit: %, Frame , FAF .
Early Observations:
- F-Air strings will still be broken… especially if they don’t DI properly
- F-Air into grab still works at low percents
- Spaced F-Air still seems safe on shield and will be her best neutral move
- Might have slightly more range
B-Air: Epona’s Kick
A stern backwards kick. While relatively weak on its own, it has devastating potential when attempting to stage spike, gimp, or kill far off stage. Amazing for edge guarding, getting in stray hits, and setting up a deadly Reverse Bouncing Fish. The strong hit has a lot more killpower now!
Hit: ?%, Frame 5-7, FAF . Lag , AC .
Early Observations:
- B-Air > Bouncing Fish still works very well and will be a key kill setup
- B-Air seems to work the same as in Melee… great hitbox in front, great knockback.
- Bair is very very good for combing and killing
U-Air: Pirouette Kick
A rhythmic crescendo of spinning kicks, unleashed like a pirouette. This attack is the single most effective aerial kill move, allowing early platform kills and kill confirms. The positioning can be used to specifically mix-up their DI for an earlier kill.
Hits 1-4: % x 4 = %, Frame , FAF. Lag , AC >
Hit 5: %, Frame .
Early Observations:
- Harder to SDI, so this one will likely always kill at high percent.
- The DI mixup is still the same… but can’t be SDI’d well!
- Might kill slightly earlier now
D-Air: Dive Kick
A dangerous but fearless downward lunge. The first strike has a spiking effect on Sheik’s body, while the second strike is purely disruptive. This is rarely a good option, but can seal an opponent’s fate when the time is right.
Early Hit: %, Frame, FAF . Spike Hitbox. Lag , AC ,>.
Late Hit: %, Frame .
Landing Hit: %, Frame .
Early Observations:
- Since grounded spikes can't be teched anymore, it seems that this may give a new kill option.
- Looks largely unchanged? Still spikes and still sends you plunging down.
- Can be seen spiking Larry Lurr’s Fox while using Fire Fox
- Very little lag upon landing. Now that you can't tech grounded spikes, this might be a good combo tool.
1.5: Specials
Vanish may be the best recovery move in the game, allowing for very safe recovery and early kills, while Needle Storm is easily the best projectile in the game, granting her unrivaled camping ability. Beyond these classic calling cards, however, Sheik’s specials have been drastically improved in this iteration of Smash. The addition of Bouncing Fish has completely overhauled her recovery and kill options, and Burst Grenade, while not phenomenal, can serve as a tool for conditioning and tricking her opponents.
Neutral Special: Needle Storm
A barrage of razor-sharp needles; debatably the best projectile in the game. The definitive spacing tool in the Sheikah arsenal, as it can beget whittle damage, kiting, gimps, and kill confirms. It drastically aids with movement, stage control, conditioning, and dictating the pace of the match. Each needle does less damage if thrown from very far away… but at higher percents, single needles will pop opponents into the air for heavy disruption.
Charge: Adds Needles on Frame: ?, ?, ?, ?, ?, ?.
6-Needle Hit Throw: ?% x 6 = ?%, Frame ?, ?, ?, ?, ?, ?, FAF ?.
Partial-Needle Hit Throw: ?% Per Needle, Frame ?, ?, ?, ?, ?. FAF ?.
Early Observations:
- Needles will still get canceled by shield, but cannot be special cancelled.
- Needle Charge can be jumped out of.
- Apparently does 12% in singles.
- Needles are still really good, but will charge more slowly.
- Full Hop Rising Needles will still combo into aerials and Bouncing Fish, and allows for an aerial before landing.
- The angle on Rising Needles is worse (30 degrees below the horizontal instead of 45)... so it may be harder to snipe steep angles. Luckily, it’ll be easier to catch far-out recoveries.
- Falling Needles actually seems to be good because lag is so low on them. You can use it as a landing option and a combo tool.
Side-Special: Burst Grenade
A crafty explosive, detonated via string. While difficult to handle correctly, one solid detonation can turn the tides of battle. There is a suction effect prior to detonation. If detonated prematurely by clashing hitboxes, the explosion becomes faster and more powerful. Now that it no longer causes her to freefall, this may be a great tool for edge guarding.
Undetonated Throw Hit: ?%, Frames ?-?, FAF.
Detonation Vacuum Hits: ?%, Frames , FAF.
Explosion Hit: %, Frames -?.
Disrupted Explosion Hit: %, Frames .
Husk Throw Hit: %
Early Observations:
- No longer causes freefall! This may finally be a good move for edge guarding and won’t insta-kill you anymore.
Up-Special: Vanish
Vanish Hit: 12%, Frames 36-38.
Reappear Hit: 1-2%, Frames 55-57.
A crafty technique passed down the Sheikah lineage, allowing fighters to vanish into thin air. Sheik shatters a Deku Nut and leaps away in the wake of the explosion. Distracted or preoccupied opponents pay a dear price for standing nearby.
Early Observations:
- Still has generous knockback, distance, and snapping ability.
- Might take slightly longer to start, but the explosion seems bigger?
- Still going to be a 50/50 kill option and edge guard staple
- Vanish will auto-cancel at certain times! They appear to be similar/identical to the timings for SSB4
Down-Special: Bouncing Fish
Utilizing a sacred understanding of nature, Sheik imitates the great Wind Fish, forcing her body forward. An astonishing tool for mobility, recovery, killing, gimping, comboing, conditioning, and making reads.
Earliest Hit: %, Frames . Intangible: ?.
Latest Hit: %, Frames FAF . Intangible: Frame -.
Early Observations:
- Seems a to kill pretty early but is a bit slower… this is good!
- Seems to still be a strong combo finisher and edge guarding staple
- Combos off of a lot of moves
- Using Bouncing Fish to force an air dodge or punish an air dodge will be huge
- Still a broken recovery/escape move. She might have the best recovery in the game.
1.6: Defense
Shield: Frames
Parry Shield Drop: Frames
Shield Lock: Frames
Forward Roll: Frames
Spot Dodge: Intangibility:
Backward Roll: Invincibility:
Neutral Air Dodge: Invincibility:
Directional Air Dodge: Invincibility:
Early Observations:
- Shield is the option that beats basically anything that isn’t a shield break, grab, or command grab.
- Shielding as an opponent is falling can force them to not attack you.
- Life gets a lot easier when you learn to Perfect Shield consistently.
- Just Shield Grab instead of dropping shield and grabbing
- OOS: Grab, Nair, Uair/Bair Needles (against safe approaches)
1.7: Movement
Early Observations:
- Dash Cancels will be the new metagame
- No more Perfect Pivots
- Directional Air Dodges add landing options. Wavelanding may be viable in certain instances.
- Grenade can be used offstage now and has very little lag, making it significantly better
- Running into shield will be less important, with more of an emphasis on crisp movement
- C-Bouncing may be taken out, unfortunately
- Because run > shield is worse, Instant Needle Cancels may be huge… and a LOT easier to do
- Limited landing lag on all aerials will make neutral even easier
1.8: Crouch
Crouch is an incredibly underrated tool for improving your approach and evasion. Moves that can be ducked under are listed under “Other” tips in the Match Up section of each character.
Early Observations:
- Crouch still seems good and can still low profile many moves
- Crawling is still great in the meta and can lead into easy whiff punishes
Chapter 2: Sheik’s Gameplay
2.1: The Neutral
The Nature of Neutral
The Neutral is a state of even, neutral advantage between characters. In this state, players try to advance their goals by securing a larger portion of the stage, hitting their opponent, and avoiding getting hit. When landing a hit or forcing the opponent to retreat, the aggressor gets put into a state of advantage and the victim gets put into a state of disadvantage. Consistently winning the neutral is the key to succeeding in competitive fighting games.
Playing the Neutral isn’t as simple as repeatedly throwing out your best move until it works. At a fundamental level, neutral involves the act of avoiding the opponent’s “threat bubble” to bait forth overcommitments and punish them. It’s primarily about understanding what your opponent wants to do, has wanted to do, and will want to do… and finding ways to snag hits while maximizing rewards and minimizing risks. You need to take mental notes of how you think they will respond and how they actually respond. If you can guess the opponent's response to your pressure, you can be as creative as you want with your punishes.
Heavy hitting characters usually play neutral by conditioning unsafe aggression from opponents and landing rare, massive punishes. Rushdown characters prefer fishing for “hit confirms” (safe, weak options that combo into much stronger attacks) for occasional, medium-strength punishes. Zoning characters prefer camping with reliable projectiles or disjointed attacks to continually snag small punishes.
While direct damage is ultimately the goal of neutral interactions, remember that your positioning on the stage can influence the success and extent of certain strategies. Typically, players prefer to control as much of the stage as possible to give themselves room for movement, positioning, and spacing while limiting their opponent’s access to these assets. There are many situations where stage control is more beneficial than adding on damage.
Sheik’s Neutral
With this in mind, Sheik has arguably the most threatening neutral game out of the entire cast, as she possesses both the strengths of rushdown and zoning characters. She has so many strong options that neutral can become a mere guessing game for the opponent. She can easily maintain advantage and force approaches with her terrifying aerials and Needles... but can also use her great speed and movement to bait and punish laggy moves. Finding a natural balance between these techniques is the best way to play Sheik.
A few key strategies for her neutral are listed below. It’s important to recognize that there is rarely one tried-and-true flow chart for dissecting an opponent’s gameplay. The circumstances of the match and the most optimal possible punishes are constantly in flux and must be continually reassessed.
- Ideal movement is the act of maximizing pressure while minimizing the likelihood of punishment. Really pay attention to the way your movement incentivizes your opponent into selecting an option. In Ultimate, movement is another form of pressure.
- When moving offensively, unpredictably shifting yourself in and out of an opponent’s “threat bubble” allows Sheik to bait out aggression and punish whiffed moves most efficiently.
- When moving defensively, understanding the utility of movement options like walking, crouching, crawling, dash-cancelling, shielding, parrying, B-Reverses, and C-Bounces allow you to complete subvert the expectations of opponents.
- Crouching, Crawling, and Walking are some of the best ways to navigate neutral, as they are minimally committal, and maintain the options that running and jumping expend.
- Dash Cancels will be huge for Sheik’s neutral, as Tilts are some of her biggest combo starters. It’ll be best to hover just outside of someone’s reach and then run in with a Dash Cancelled F-Tilt.
- Sheik’s aerials and Needles, when used correctly, are almost unpunishable against most of cast and should be used to threaten the opponent whenever it’s convenient. Sheik’s falling F-Air is one of the safest non-disjointed aerials in the game, functioning as both a pressure tool and a combo starter. Needles are some of the best projectiles in the game, offering free damage, refreshing combo/kill moves, helping survey habits, and irritating the opponent. Abusing these tools can be the difference between a clear victory and a frustrating loss.
- The best way to punish neutral options is to take advantage of the opponent’s habits and main focus. All characters’ neutral game can be played around.
- Example: If the opponent is standing at midrange, they have to constantly consider the role that Needles play in the neutral. If they expect that you're going to unload on them, take advantage of that. If not getting hit is their top priority, they're forced to jump, shield, or retreat... all of which can be covered if considered or hard-punished if anticipated.
- Jumping is a commitment and can be punished. It locks characters out of all grounded options and forces characters into an expiring, more-predictable movement pattern. It is an expendable resource, as what goes up MUST come down. It is often used as a means of avoiding an attacking or initiating an aerial.
- Example: Jump can be soft-punished with Needles on landing, medium-punished with an aerial combo, or hard-punished with an U-Smash. If the opponent is already in the air and focused on not getting poked with Needles after their initial jump trajectory, they might try to jump again to avoid the hit; as such, you can hit them with a full clip of Needles (or something more aggressive) as they land after their double jump is expended.
- Shielding is a commitment and can be punished. It locks characters into their immediate position, limiting movement and slowing down all grounded actions. It is an expendable resource, as shields will eventually break if not maintained or timed perfectly. It is often used when the opponent expects to be hit.
- Example: Shield can be soft-punished by applying safe shield pressure, medium-punished by grabbing, or hard-punished by reading an out of shield option. If the opponent thinks that you're about to use an aerial on their shield, they will likely hold shield or roll away; you can capitalize by feinting an aerial with short hop and then running in for a grab after fastfalling, which is known as a tomahawk grab. If your opponent thinks you're going to grab, they will likely do a fast out of shield option like jab, grab, or spot dodge; this new defensive option can in turn be punished in whatever way you see fit.
- Retreating is a commitment and can be punished. While it doesn't lock characters into any particular option, it results in a loss of stage control... which in turn limits their movement and options. It is an expendable resource, as characters die when they are forced off of the stage. It is often used when the opponent doesn’t know how to deal with a neutral option.
- Example: Retreating can be soft-punished by simply regaining stage control, medium-punished with Needles, or hard-punished by running in and grabbing, dash-cancel attacking, or using Bouncing Fish.
- Attacking/Grabbing are some of the biggest commitments in the game and can be punished when used prematurely. Using a move locks characters out of all other options until the move has finished and can often shift their hurtbox in exploitable ways. It is primarily used to exploit holes in defense or over aggressive movements.
- Example: If an opponent chooses to throw out an attack, it can usually be soft-punished by interrupting with a faster normal, medium-punished by avoiding it and using an aerial, or hard-punished by a microspacing and throwing out a Smash attack.
- Saving an opponent's habits in your mind can be more valuable than punishing them right away. In similar situations, the same read or read could have drastically different rewards. If you’re not thinking about the past, present, and future, you’re not fully playing neutral.
- Example: If you know that an opponent likes to spot dodge after whiffing a Smash attack to avoid a grab, you can slightly charge an F-Smash to punish it. Landing an F-Smash at kill percent gives a noticeably bigger punish than at low percent.
2.2: Advantage State
The Nature of Advantage
When an interaction in the neutral is won, the aggressor is given a state of advantage that allows progress towards their main objectives. This earned advantage is best spent performing an optimal attack or combo, pressuring the opponent offstage, gauging the opponent’s habits, or partially resetting neutral if the risk is not worth the potential reward.
Ideal punishes usually take the form of true combos (attack strings that are guaranteed just by inputting them correctly), but can also take the form of frame traps (combos that are guaranteed when covering all possible escape options), mix-ups (combos that are only “guaranteed” when reading a particular escape option), and raw attacks. You will usually have multiple types of options at your disposal, so it’s important to weigh the risk and reward of each type of aggression. The best way to spend advantage depends on a lot of variables, including character selections, stages, mentality, skill level, stage position, and damage.
Sheik’s Advantage
Sheik’s kit allows for one of the strongest advantage states in the game, offering incredible flexibility, solid damage output, and staggering variety. Her aggression relies on a variety of situational combos, option coverage, mind games, and thinking on your feet… so knowing when to continue aggression, when to cover multiple options, and when to drop a combo for a hard punish is absolutely crucial. She is a dominant character because she has an option for almost any situation and can combat any playstyle.
At lower percents, she’ll look for her signature combos and overwhelming neutral interactions to pile on damage. At middle percents, she’ll begin to look for ways to gimp or ledge trap. At high percents, she’ll look into finishing the stock with her tilt and aerial kill confirms or amazing edge guarding.
2.3: Combos
Despite her reliance on freestyle play, Sheik has a variety of “bread and butter” techniques that will help net you easy damage until kill percent. As many of Sheik’s moves are both pressure tools and combo tools, any victory in the neutral has the potential to snowball into something more. Even though her moves don’t do a lot of individual damage, they work together to become truly terrifying.
Low Percent
- Tilt Strings: F-Tilt, D-Tilt, and (sometimes) U-Tilt will easily combo into themselves and other grounded options at low percent, especially when combined with dash cancels.
- Tilt > Aerial: Because her tilts start off with very low-knockback, they can easily link into aerials.
- Aerial Strings: These are the signature Sheik carry combos, racking up good damage and seizing the entirety of stage control. While F-Air is the most versatile, both N-Air and B-Air can also have uses. Once you’ve run out of stage to traverse, it’s best to finish it off with a combo finisher like Nair, B-Air, U-Air, or Bouncing Fish.
- Aerial > Grab: Very low percent option for absolutely seizing stage control.
- F-Throw > Bouncing Fish or Aerial: An amazing, easy tool for damage and stage control.
- D-Throw > U-Air: Not as good as F-Throw, but good for DI Mixups and situational positioning.
- Jab 1-2 > Normals, Grab, or F-Smash: This is not necessarily guaranteed, but is a great mix-up.
Mid Percent
- Tilts Strings: While not as mindless as at low percent, a few tilts may still string together on fast fallers and big targets.
- Tilt > Aerial: At middling percents, any well-spaced tilt will send the opponent into a great position in the air. This is where the scary combos can become early kills off the side.
- Aerial Strings: This is the signature Sheik combo, racking up good damage and seizing stage control. At this percent, alternate F-Air with N-Air or D-Air for better damage.
High Percent
- F-Air > U-Smash: While this is still being explored, it has been seen repeatedly in the demo.
- FH Rising Needles > Bouncing Fish: The most satisfying kill confirm. Works around 110%
- F-Tilt or Tipper D-Tilt > U-Air or Vanish: At high percents, a true 50/50 emerges off of perfectly spaced tilts. With some rage, this will kill around 110% on medium weight characters.
- Weak N-Air or Weak B-Air > Bouncing Fish: Sheik’s second-most satisfying kill confirm. Unfortunately it involves a good deal of prediction to land correctly.
“Don’t Panic” Percent
- If no kill confirms will work, it's best for Sheik to play the long game and go for a gimp or just maintain the lead.
- Cross-up > F-Smash
- Raw B-Air
- U-Throw?
- FH Rising Needles > DJ Bouncing Fish: Can work at weird percentages if you’re lucky.
2.4: Holding the Ledge
Once you have completely secured stage control, it’s time to push the opponent off stage. When the opponent is near the ledge or offstage, they have had their options minimized and are able to be exploited. If you can successfully get the opponent to spend their recovery resources, you can rack up ridiculous amounts of damage or even take an early stock.
Holding the ledge is comprised of three related, progressively advantageous situations: Corner Pressure, Ledge Trapping, and Edge Guarding. Corner Pressure is the process of containing the opponent on the far side of the stage. Ledge Trapping is the act of preventing a ledge-hanging opponent from safely transitioning back onto the main stage. Edge Guarding is the act of preventing an airborne recovery from returning to the stage altogether.
Corner Pressuring
In this position, stage control is entirely yours. The opponent has to play the neutral perfectly or they will be sent to the most vulnerable position in the game: offstage. When cornered, they are largely unable to use grounded movement and you can use as much of it as you’d like. This will force them to commit to a shield, a jump, a roll, or a to fight there way out.
- Wall out jumping opponents with aerials or U-Smash.
- Punish rolling opponents with a dash grab, dash-cancel attacks, or Bouncing Fish.
- Punish attacking opponents with shield or counterattacks.
- Ledge-Cancelled Multi-jab can combo into D-Air or Grenade, depending on position.
Ledge Trapping
In this position, the opponent is on a timer to return back to the stage. If they don’t get off the stage quickly enough, they’ll lose invincibility and be at their most vulnerable on-stage position. If they fail to correctly return to stage enough times, they will be completely unable to grab the ledge and fall to their death. Because they are on a timer and forced to expend resources, it is in your best interest to remain patient, condition their responses, and punish them on reaction. Ledge trumps and two-framing are potentially good mix-ups, though their effectiveness in Ultimate are unknown.
- Always keep their roll or jump in mind.
- Stuff jumps with SH aerials.
- Punish roll with boost grab.
- Cover Jump/Roll with retreating SH N-Air.
- Cover regular get up and attack with Shielded grab.
- Punish waiting by getting a D-Air or trumping.
- The best way to punish get up is by standing slightly behind the standard get up location. This allows you to reach all grounded get ups while pressuring jumps. You also get the option of D-Tilt and Ledge Trump if they fail to act quickly.
- Hit confirm with well-spaced normals or retreating F-Air for standing shield pressure.
- Full Needle Clip at a distance covers every get-up option but jump and resets the ledge situation.
- Standing Perfectly between Standard Getup Position and Roll Position will allow you to soft punish any option on (good) reaction.
- Spaced Shield into Grab/OOS Aerial beats Standard Get-Up, Get-Up Attack, Jumping Attack, and Roll.
- Retreating SH N-Air beats Jump and Standard Get-Up, as well as allowing a FF into boost grab on the Roll. This allows either a hard punish or a ledge reset.
- U-Tilt/U-Smash punishes Standard Get-Up and Jump. This is somewhat risky, but is a stronger punish than Nair or Grab.
- Spaced D-Tilt: Used to punish prolonged hesitation, re-grabs, and two-frame ledge snaps. Follows up into an aerial or even a tipper U-Smash.
- Ledge Trump: Used to punish hesitation. Can be used in conjunction with B-Air or Thief Grenade. Opponents who avoid this will almost always buffer Roll.
- Rising Needles: A kill confirm on opponents without invincibility at high percents.
- With Opponent On Stage: Space to apply pressure to shield without being hit.
- With Opponent On Ledge: Standard options are either covered by FF SH N-Air and spaced.
Edge Guarding
Once the opponent has been completely pressured offstage, most characters are reduced to using only a small handful of options: double jump, fast aerial attacks, air dodge, and recovery moves. Forcing opponents to burn these options prematurely is the essence of edge guarding.
- Once the opponent uses their double jump and/or air dodge, their options are the most limited that they will ever be. Force these options and then commit to a strong punish.
- Never be afraid to go very deep. Sheik has one of the best recoveries in the game. As a character with a very good recovery, your goal is to position yourself slightly farther out than they can recover. Just being in front of them is pressure enough to force an action, which you can easily react to with an aerial. B-Air is great for this.
- Connecting a full clip of Rising Needles can win you the game at any percent, as they steal forwards momentum and can force laggy dodges or double jumps far off stage.
- B-Reverse Falling Needles off stage snipes stage-hugging recoveries, though the angle change may make it more committal
- Rushing run-off Bouncing Fish can frame trap them near the blast zone, allowing for a fresh F-Air to snag the kill
- Run-off aerials force opponents into very awkward positions, especially when they linger.
- Stage spiking is easiest with a rising N-Air or B-Air (depending on your direction) when the opponent recovers in close to the stage. Drop down F-Air can also work.
- B-Reverse/Rebounding Bouncing Fish when you’re hanging from the ledge can allow you to go as deep as you want without burning your jump or Vanish. Very linear recoveries are particularly susceptible to Rebounding Fish.
- Run-Off Buffered Vanish is great. Nobody knows the physics and it’s unpunishable for most.
- Drop Down > Jump Up > B-Air: Phenomenal for stage spiking
- Drop Down Vanish: Surprising, strong, and has a good change to stage spike or outright kill.
2.5: Killing
While Sheik has always been phenomenal at racking up damage, she has historically struggled to kill evasive opponents. Fortunately, this seems to be a little less troublesome this time around. Between her classic tilt 50/50s, buffed knockback on aerials, buffed knockback on Bouncing Fish, and amazing gimp potential, it’s possible that she will kill pretty consistently. It’s just a matter of knowing your options and knowing when to strike.
Kill Confirms
- F-Tilt > U-Air or Vanish: A 50/50, based upon double jump or air dodge reactions. (~?%)
- Crossup B-Air on Shield > Kill Option: Forces defensive opponents into the 50/50 (~?%)
- Tipper D-Tilt > U-Air or Vanish: True 50/50 and safe on shield. (~?%)
- Rising Needles > Bouncing Fish: Very safe and versatile. (~?%)
- Ledge Trump > B-Air: Good after letting opponent sit on ledge multiple times. (?%)
- N-Air/F-Air/B-Air > Tipper U-Smash: Kills earlier than Bouncing Fish, but strict. (?%)
- N-Air > Bouncing Fish: The most reliable “pursuit” setup. (~?%)
- B-Air > Bouncing Fish: Can be safe on shield. Go for hard hit at low %, soft at high %. (?%)
- F-Air > Bouncing Fish: Can kill *very* early near the edge or when stuck on platform. (?%)
- Rising F-Air > Bouncing Fish: Simple and clean. Safe on shield hit. (~?%)
- D-Tilt on Ledge > Creativity. (?%)
- Offstage D-Air (Sheikahcide). Only use when up one stock. (~?%)
Kill Mixups
- Tipper U-Smash upon opponent jumping/landing
- Run-up U-Smash can hit the tipper on tall characters
- Hidden Power Fire: Grounded Vanish Trap upon unsafe approach/getup. Return to middle stage once if possible. 45º angle will AC, but can sometimes clip them out of a death if you collide on the Reappear.
Raw Kill Strategies
- On platformed stages, use needles to repeatedly cover all non-jumping getups. This will make landing on a platform very tempting, and then becomes a matter of correctly guessing which portion they’ll land on.
- Crossing up on shield (maybe with B-Air) is nice for getting a predictable, hasty shield drop. Punish that with an F-Smash for a cleaner kill.
- ?
2.6: Disadvantage State
The Nature of Disadvantage
When an interaction in the neutral is lost, the loser is repeatedly punished for doing so and is forced to diffuse the opponent’s aggression by any means possible. If the opponent doesn’t intentionally end aggression, this earned disadvantage is often only escaped by air dodging, disruptive attacks, or retreating to the ledge.
Sheik’s Disadvantage
Sheik’s disadvantage is very good in Smash Ultimate, as it combines the strengths of her Smash 4 moveset and with the advantages of being a fast faller in a low-combo game engine. She can use Bouncing Fish, Vanish, fast aerials, Needles, Grenade, B-Reversing, and more to navigate disadvantage better than most of the cast.
2.7: Reclaiming the Ledge
Escaping Corner Pressure
- Sheik’s Double Jump Bouncing Fish is amazing at returning to center stage if the opponent doesn’t call out the first jump.
Escaping Ledge Traps
- If they’re good, avoid rolling until you’re very sure that they’re overcommitting.
- Use jumps wisely. Jumping into Bouncing Fish is good, but not always safe if overused.
- Observe their aggression patterns and be patient.
Escaping Edge Guards
- Do not be predictable. Don’t burn Bouncing Fish immediately at low/mid percents.
- Avoid rolling unless they overcommit.
- Avoid the regrab and trumps at all costs.
- Take note of their movements beforehand and act when they overcommit.
- When wall clinging, pressing Jump moves you a LOT higher than using the wall jump input.
- On stages with a straight edge, you can recover from the lowest height on the screen without you jump.
2.8: Optimal Control Scheme
Below is the control set that I believe to be optimal for the Nintendo Gamecube Controller in Smash 4. This is subject to change in Smash Ultimate, as advanced tech may have changed considerably.
Attack: A, C-Stick
Special: B, L
Shield: R, D-Pad
Jump: Y, Z
Grab: X
Shoulder buttons and X/Y buttons can be swapped around, if you prefer, but I find this to be the most comfortable. I think it is important to have an analog-only shoulder button for Short Hops, and I’d argue that L Button + C-Stick is the most consistent way to C-Bounce without contorting your hands.
While it is obviously not required, I also personally prefer to have Mid-Smash Rumble set to “On” (i.e. it serves as an additional source of mid-game information, assisting in the timing for Sheik’s inputs); tactile reaction speed is typically faster than auditory or visual. Additionally, I prefer to have a D-Pad Shield Button to serve as an emergency Shield/Tech/Dodge button if I accidentally lose my preferred grip on the controller.
Chapter 3: Sheik’s Stage Selection
Sheik is easily one of the most adaptive characters in the game, so it follows that she can take advantage of any tournament legal stage. That is not to say, however, that she doesn’t have her preferences. The strengths and weaknesses of each stage are selected below. Each entry details Sheik's performance in the neutral, advantage state, disadvantage state, guarding the ledge, other important notes, and when to strike/select the stage.
Final Destination
Neutral:
Advantage:
Disadvantage:
Ledge Dynamics:
Other Notes:
Pick Against:
Ban Against:
Smashville
Neutral:
Advantage:
Disadvantage:
Ledge Dynamics:
Other Notes:
Pick Against:
Ban Against:
Pokemon Stadium
Neutral:
Advantage:
Disadvantage:
Ledge Dynamics:
Other Notes:
Pick Against:
Ban Against:
Battlefield
Neutral:
Advantage:
Disadvantage:
Ledge Dynamics:
Other Notes:
Pick Against:
Ban Against:
Wario Ware
Neutral:
Advantage:
Disadvantage:
Ledge Dynamics:
Other Notes:
Pick Against:
Ban Against:
Skyloft
Neutral:
Advantage:
Disadvantage:
Ledge Dynamics:
Other Notes:
Pick Against:
Ban Against:
Arena Ferox
Neutral:
Advantage:
Disadvantage:
Ledge Dynamics:
Other Notes:
Pick Against:
Ban Against:
Town & City
Neutral:
Advantage:
Disadvantage:
Ledge Dynamics:
Other Notes:
Pick Against:
Ban Against:
Kalos Pokemon League
Neutral:
Advantage:
Disadvantage:
Ledge Dynamics:
Other Notes:
Pick Against:
Ban Against:
Frigate Orpheon
Neutral:
Advantage:
Disadvantage:
Ledge Dynamics:
Other Notes:
Pick Against:
Ban Against:
Chapter 4: Sheik’s Match-Ups
Sheik's kit offers some of the most options out of any character in the game. Thanks to her rushdown abilities and frame data, she is able to completely shut down many zoning characters; thanks to her frame data, zoning tools, and turtling abilities, she is also capable of invalidating many heavy characters when played correctly.
The specifics of each MU will be found in the MU tool.
This blog post was written by a SSB World community member. Share your Smash 4 knowledge by creating your own blog post now.
Share your feedback:
You must log in to comment.


