The Pokemon Trainer Field Guide
The Pokémon Trainer Field Guide
Hello! I’m HL | Contrary and I’ve been a Sheik and Pokemon main for my entire Smash Bros career. This guide is all about how to play the most unique character in Super Smash Brothers Ultimate: Pokemon Trainer!
This is heavily based on my Sheikah Encyclopedia, a Sheik character resource; these started out as my personal pencil-and-paper notes on gameplay, but eventually evolved into a bit of a pet project. You can (and should!) follow me on Twitter, especially if you need any more information or want to contribute. I intend on sharing this work with the Smash community as a whole, and I welcome criticism, advice, and additional information!
This guide draws from a variety of sources, including the Pokemon Trainer Discord, Smashboards Forums, Smash Bros Subreddits, Smash YouTube Channels, Kurogane Hammer, and direct advice from ranked Pokemon Trainer players. My goal is to make the Pokemon Trainer Field Guide the definitive online resource for Sheik in SSBU, providing basic information for beginners alongside more niche information for established players in the competitive scene.
Table of Contents
Chapter 1 : Squirtle Moveset - Normals, Smashes, Throws, Aerials, Specials, Movement
Chapter 2 : Ivysaur Moveset - Normals, Smashes, Throws, Aerials, Specials, Movement
Chapter 3 : Charizard Moveset - Normals, Smashes, Throws, Aerials, Specials, Movement
Chapter 4 : Pokemon Trainer Gameplay - Match Objectives, Neutral, Advantage, Key Combos, Disadvantage, Ledge Game, Controls
Chapter 5 : Pokemon Trainer Stage Selection - Neutral, Advantage, Disadvantage, Ledge, Stage Striking
Chapter 6 : Pokemon Trainer - MU Chart, MU Resource Link
Chapter 1: Squirtles’s Moveset

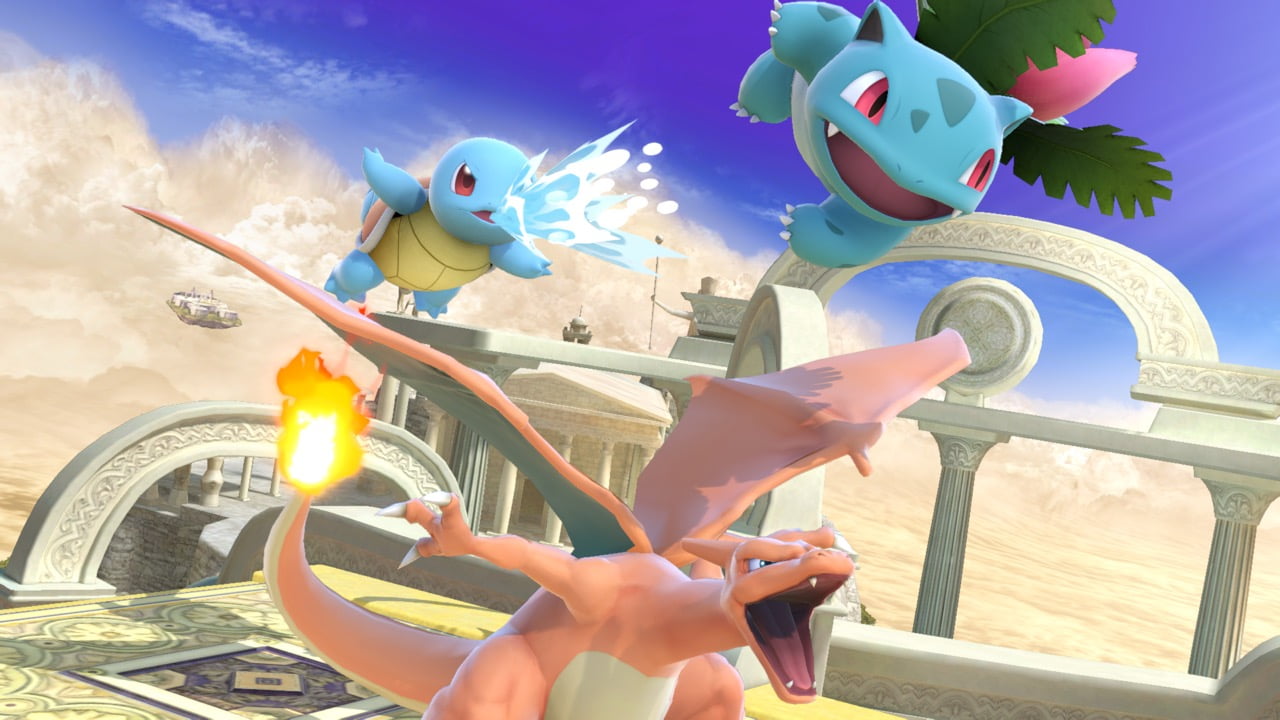
Squirtle is the fastest and smallest member of the trio, providing rushdown elements to the Trainer’s option set. His small hurtbox, blinding frame data, and great speed make him very difficult to hit, but he’ll die somewhat early and will likely have trouble killing without a hard read.
1.1: Normals
Jab: Fake Out
A very fast, low, fairly damaging series of jabs. As it's his fastest move, it'll primarily be a get-off me move, but may have more utility for mixups.
Jab 1: 1.8%, Frame 2-3, FAF ?.
Jab 2: 5%, Frame 4-5, FAF ?.
Jab 3: ?%, Frame 4, FAF ?.
Useful Info, Follow-Ups, Kill Percents, and Techniques
- Primarily used for interrupting slower attacks and resetting neutral.
- Could be mixed up into a slightly more commital option like grab or tilt.
- Squirtle's height makes this basically hit any grounded opponent.
Dash Attack: Surf
A low, charging drop kick, guided by a river of water. With his fast run speed this will be very useful for punishing landings and whiffs.
Early Hit: ?%, Frames 8, FAF 36.
Useful Info, Follow-Ups, Kill Percents, and Techniques
- Since this move causes squirtle to slide on his back, it can be used to slide under higher attacks.
F-Tilt: Tail Whip
A very fast, low-profile tail slap that has the most range of his normals. This is tied for being his fastest tilt and is probably his best grounded neutral tool.
Early Hit: ?%, Frames 5-7, FAF 18 .
Useful Info, Follow-Ups, Kill Percents, and Techniques
- F-Tilt can be angled for a variety of attack and launch trajectories.
- Depending on the angle, this might set up tech chase situations.
- Using this out of a Dash Cancel will be very scary.
U-Tilt: Headbutt
A jumping headbutt into the air. It's fast, with great vertical range, but has very mediocre horizontal range. It might be good as a combo extender or an anti-air.
Early Hit: ?%, Frames 5-7, FAF 18 .
Useful Info, Follow-Ups, Kill Percents, and Techniques
- U-Tilt > U-Tilt (~?%)
- U-Tilt > U-Air (~?%)
D-Tilt: Splash
A splash of water that covers the ground. While its range is mediocre, it low profiles a lot of moves and can set up tech chases.
Early Hit: ?%, Frames 8, FAF 30.
Useful Info, Follow-Ups, Kill Percents, and Techniques
- When this causes a tech chase situation, a grab, dash attack, or a dash-cancelled burst option are your best bet for a hard punish. Water Gun and Withdraw might be solid options if you don't want to make a hard commitment.
1.2: Smashes
[General Description of Smash Attack Utility and What It Does For The Character]
F-Smash: Water Pledge
A wide arc of water, spouting from Squirtle's mouth. It's Squirtle's slowest Smash, but the best for killing off the side.
Early Hit: %, Frames 23-?, FAF ?.
Useful Info, Follow-Ups, Kill Percents, and Techniques
- This is just a basic, medium speed Smash attack.
U-Smash: Water Spout
A huge fountain of water that erupts from the ground. Very strong, particularly disjointed, and decently fast. This will likely be his go-to kill move and anti-air tool.
Early Hit: ?%, Frames 19-25, FAF ?.
Useful Info, Follow-Ups, Kill Percents, and Techniques
- The U-Smash hitbox is disjointed and absolutely massive, standing three times as high as Squirtle's body and hitting on both sides. This will catch landings, beat out attacks, and completely cover platform landings. This will probably be used more than any other Smash attack.
D-Smash: Whirlpool
A fast spin, wrapped in a spinning stream of water. Decent range, but long. The front hit comes out faster than the other smashes, but the back hit is slower than any of his moves. It sends opponents at an awkward, downward angle.
Front Hit: ?%, Frames 18-?.
Back Hit: ?%, Frames 25-?, FAF 40.
Useful Info, Follow-Ups, Kill Percents, and Techniques
- If anything, this will be used to set up for edge guards.
1.3: Throws
[Description of Character's Throw Game]
Grab:
Standing Grab: Frame 6-7, FAF ?.
Dash Grab: Frame ?-?, FAF ?.
Pivot Grab: Frame ?, FAF ?.
Pummel: 1.3%, Frame ?.
Grab Release: FAF ?.
Useful Info, Follow-Ups, and Techniques
- Pummel does decent damage and is pretty fast
- Try to pummel once for every ?% if you opponent is mashing.
F-Throw
Squirtle dropkicks the opponent forward at a steep angle. Use this to force tech chases at lower percents.
Hit: %, Frames .
Useful Info, Follow-Ups, Kill Percents, and Techniques
- This will often force tech situations, but might be outclassed by U-Throw.
- The odd angle might be most ideal for throwing opponents offstage for an edge guard.
B-Throw
A standard backward throw that sends the opponent up and away. It'll kill at very high percents.
Hit: %, Frames .
Useful Info, Follow-Ups, Kill Percents, and Techniques
- This will kill at the side of the stage around 160%.
U-Throw
A toss straight into the air. With low lag and very little distance, this will likely be Squirtle's combo throw.
Hit: 8.8%, Frames .
Useful Info, Follow-Ups, Kill Percents, and Techniques
- U-Throw > U-Air > F-Air or B-Air (Low %)
D-Throw
Squirtle hops on top of the opponent and sends them flying slightly up and away.
Hit: 8.8%, Frames .
Useful Info, Follow-Ups, Kill Percents, and Techniques
- The angle on this throw is really awkward. Might force a tech on platforms at some percents.
1.4: Aerials
[Description of general aerial gameplay and how they benefit the character].
Neutral Aerial (N-Air): Rapid Spin
A fast multihit spin within Squirtle's shell. It's his fastest aerial, so it might be an okay move for breaking combos without airdodging. It might primarily be a pressure/crossup move.
Hit: %, Frames 4- , FAF 42, Lag 8.
Useful Info, Follow-Ups, Kill Percents, and Techniques
- [Example]
Forward Aerial (F-Air):
A drop kick, wrapped in a vortext of water. Best for catching jumps and
Hit: 7.6%, Frames 5, FAF 35, Lag 6.
Useful Info, Follow-Ups, Kill Percents, and Techniques
- [Example]
Back Aerial (B-Air):
A backwards drill attack with Squirtle's legs. Primarily a pressure/crossup tool.
Hit: 11.7%, Frames 5- , FAF 44, Lag 18.
Useful Info, Follow-Ups, Kill Percents, and Techniques
- [Example]
- [Example]
- [Example]
Up Aerial (U-Air):
A fast vertical spinning tail flip. It might have mediocre horizontal range but will be solid for juggling.
Hit: 8.8%, Frames 5- , FAF , Lag 10.
Useful Info, Follow-Ups, Kill Percents, and Techniques
- [Example]
- [Example]
- [Example]
Down Aerial (D-Air):
A downward drill attack with Squirtle's tail.
Hit: %, Frames 5- , FAF 40, Lag 16.
Useful Info, Follow-Ups, Kill Percents, and Techniques
- [Example]
- [Example]
- [Example]
1.5: Specials
[General Description of Specials and how they improve the character]
Neutral Special: Water Gun
A charged up jetstream of water. Great for edge guarding and grabbing stage control. Using this at the right time can turn the tides of battle. Sends people a surprisingly long distance.
Hit: %, Frames 24-35.
Useful Info, Follow-Ups, Kill Percents, and Techniques
- [Example]
- [Example]
- [Example]
Side Special: Withdraw
Squirtle withdraws into his shell and slides forward very quickly. This can be edge canceled and canceled in the middle of the slide.
Hit: 14.8%, Frames 21-?, FAF ?.
Useful Info, Follow-Ups, Kill Percents, and Techniques
- [Example]
- [Example]
- [Example]
Up Special: Waterfall
Squirtle summons his inner strength to climb through the air, as if he was ascending a waterfall. A medium-length recovery with decent knockback.
Hit: %, Frames 9-?.
Useful Info, Follow-Ups, Kill Percents, and Techniques
- [Example]
- [Example]
- [Example]
Down Special: Pokemon Change
The Pokemon Trainer calls Squirtle back, instantly swapping into Ivysaur! This works as a fast air dodge and will be useful for getting into a more advantageous situation. You'll want to use this when you need better zoning or neutral tools or want to nab a kill.
Hit: Intangibility Frames 1-30, FAF 40.
Useful Info, Follow-Ups, Kill Percents, and Techniques
- [Example]
- [Example]
- [Example]
1.6: Defense
Shield: Frames
Parry Shield Drop: Frames
Shield Lock: Frames
Forward Roll: Frames
Spot Dodge: Intangibility:
Backward Roll: Invincibility:
Neutral Air Dodge: Invincibility:
Directional Air Dodge: Invincibility:
[Description of Defensive Options]
Useful Info, Follow-Ups, Kill Percents, and Techniques
- [Example]
- [Example]
- [Example]
1.7: Movement
Squirtle's dash speed is very fast and his air mobility is just as good.
Useful Info, Follow-Ups, Kill Percents, and Techniques
- [Example]
- [Example]
- [Example]
1.8: Crouch
Crouching and Crawling are an incredibly underrated tools for improving your approach and evasion. Squirtle can use his Crouch or Crawl to move under most attacks.
[Add hurtbox visualization to make this more effective.]
The uses of Crouch in each MU will be listed specifically in the MU section, but some examples include:
- [Example of Projectile]
- [Example of Aerial]
- [Example of Smash Attack]
Chapter 2: Ivysaur's Moveset
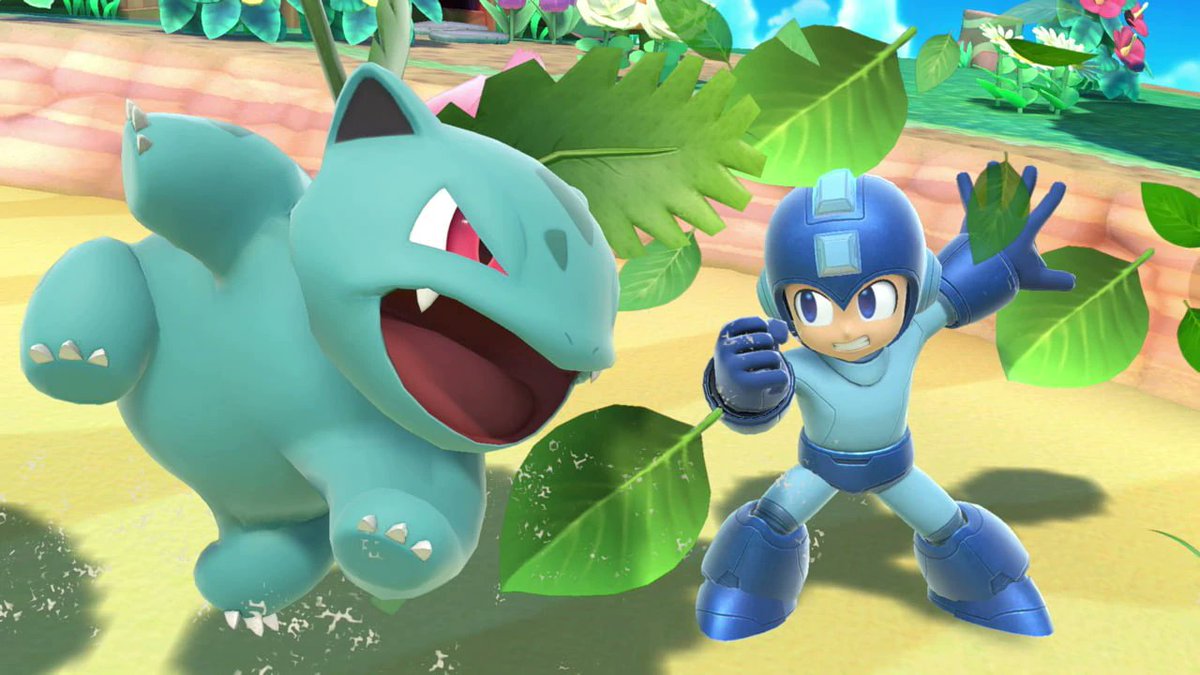
[Description of character's general moveset]
2.1: Normals
[Description of faster grounded options and the utility they bring to the character.]
Jab: Fury Cutter
Ivysaur repeatedly barrages the opponent with vines for solid damage.
Jab 1: ?%, Frame 7-9, FAF ?.
Jab 2: ?%, Frame 4-6, FAF ?.
Useful Info, Follow-Ups, Kill Percents, and Techniques
- [Example]
- [Example]
- [Example]
Dash Attack: Tackle
A straight forward tackle. Probably just good for punishing whiffs quickly.
Hit: %, Frames 4-11.
Useful Info, Follow-Ups, Kill Percents, and Techniques
- [Example]
- [Example]
- [Example]
F-Tilt: Cut
A whirling arc of Ivysaur's leaves that slice into the opponent. Seems to be some sort of poking tool or get-off-me option.
Hit: %, Frames 10, 12, 14, 16, 18, 20, 22 .
Useful Info, Follow-Ups, Kill Percents, and Techniques
- [Example]
- [Example]
- [Example]
U-Tilt: Ingrain
Vines rooted in the ground, Ivysaur propels himself up to stand up to falling opponents.
Hit: %, Frames 7-9.
Useful Info, Follow-Ups, Kill Percents, and Techniques
- [Example]
- [Example]
- [Example]
D-Tilt: Power Whip
A slap of Ivysaur's vines against the ground. Likely a good poking tool.
Hit: %, Frames 4-?, FAF 30.
Useful Info, Follow-Ups, Kill Percents, and Techniques
- [Example]
- [Example]
- [Example]
2.2: Smashes
[General Description of Smash Attack Utility and What It Does For The Character]
F-Smash: Body Slam
A body lunge, propelled by Ivysaur's vines. It boasts surprisingly long range.
Hit: %, Frames 15-18.
Useful Info, Follow-Ups, Kill Percents, and Techniques
- [Example]
- [Example]
- [Example]
U-Smash: Stun Spore
A huge plume of spores burst out of Ivysaur's bulb, launching opponents into the air.
Hit: %, Frames 26-?.
Useful Info, Follow-Ups, Kill Percents, and Techniques
- [Example]
- [Example]
- [Example]
D-Smash: Grass Knot
Ivysaur wraps his vines around him in an attempt to trip nearby grounded opponents.
Hit: %, Frames 13-16.
Useful Info, Follow-Ups, Kill Percents, and Techniques
- [Example]
- [Example]
- [Example]
2.3: Throws
[Description of Character's Throw Game]
Grab: Bind
Standing Grab: Frame 13-?, FAF 42.
Dash Grab: Frame 13-?, FAF 49.
Pivot Grab: Frame 13-?, FAF ?.
Pummel: ?%, Frame ?.
Grab Release: FAF ?.
Useful Tips for Grabs and Pummels:
- [Example]
F-Throw: Nature Power
Swings the opponent forward, with little follow-up potential. Best for throwing off stage or resetting neutral.
Hit: %, Frames .
Useful Info, Follow-Ups, Kill Percents, and Techniques
- [Example]
- [Example]
- [Example]
B-Throw: Secret Power
A massive swing back through the air. A surprisingly strong kill throw.
Hit: %, Frames .
Useful Info, Follow-Ups, Kill Percents, and Techniques
- [Example]
- [Example]
- [Example]
U-Throw: Hidden Power
Launches the opponent up in the air, setting up into aerials, Vine Whip, or Bullet Seed.
Hit: %, Frames .
Useful Info, Follow-Ups, Kill Percents, and Techniques
- [Example]
- [Example]
- [Example]
D-Throw: Rototiller
Slams the opponent into the ground, sending them forward and up.
Hit: %, Frames .
Useful Info, Follow-Ups, Kill Percents, and Techniques
- [Example]
- [Example]
- [Example]
2.4: Aerials
[Description of general aerial gameplay and how they benefit the character].
Neutral Aerial (N-Air): Petal Blizzard
A jumping flurry of leaves that drags opponents with Ivysaur. This will be great for ledge trapping and comboing. It has very little lag.
Hit: ?%, Frames 7, 10, 13, 16, 19, 22, 25, 28,; FAF ?, Lag 16.
Useful Info, Follow-Ups, Kill Percents, and Techniques
- [Example]
Forward Aerial (F-Air): Knock Off
A vine smack up and forward into the air, looking to completely reset neutral. Better than B-Air for killing off the top, but worse overall.
Hit: 13.1%, Frames 14-18, FAF ?, Lag 16.
Useful Info, Follow-Ups, Kill Percents, and Techniques
- [Example]
- [Example]
- [Example]
Back Aerial (B-Air): Grass Pledge
A huge, disjointed swing of Ivysaur's vines. This will be great for spacing in the neutral, edge-guarding, and walling opponents out.
Hit: %, Frames 7-9, Lag 7.
Hit: %, Frames 14-16; FAF 42, Lag 7.
Useful Info, Follow-Ups, Kill Percents, and Techniques
- [Example]
- [Example]
- [Example]
Bair is very very good for combing and killing
Up Aerial (U-Air): Poison Powder
A large burst of upward powder sends Ivysaur down and the opponent up. This is great for returning to stage quickly while juggling.
Hit: %, Frames 12-13, FAF ?, Lag 12.
Useful Info, Follow-Ups, Kill Percents, and Techniques
- [Example]
- [Example]
- [Example]
Down Aerial (D-Air): Sleep Powder
A large downward burst of powder that stalls Ivysaur in the air and will spike the opponent if it connects.
Hit: %, Frames 11-12, FAF ?, Lag ?.
Useful Info, Follow-Ups, Kill Percents, and Techniques
- [Example]
- [Example]
- [Example]
2.5: Specials
[General Description of Specials and how they improve the character]
Neutral Special: Bullet Seed
A barrage of seeds is shot straight into the air. It goes up suprisingly high and can scoop opponents in from the side. Has some startup invincibility.
Hit: %, Frames 6-?, FAF ?.
Useful Info, Follow-Ups, Kill Percents, and Techniques
- [Example]
- [Example]
- [Example]
Side Special: Razor Leaf
Ivysaur shoots out a razor-sharp leaf from her bulb. This moves fast enough to chase opponents, but slow enough to clear Ivysaur's approach. The distance and angle can vary with your input.
Hit: %, Frames 21-72, FAF .
Useful Info, Follow-Ups, Kill Percents, and Techniques
- [Example]
- [Example]
- [Example]
Up Special: Vine Whip
A powerful snap of Ivysaur's vines that can snap to the ledge or anti-air jumping opponents. It's only okay as a recovery and has no hitbox on the ground, but the sweetspot can make her ledge pressure very scary.
Grounded: %, Frames 20-?, FAF.
Airborn: %, Frames 16.
Useful Info, Follow-Ups, Kill Percents, and Techniques
- [Example]
- [Example]
- [Example]
Down Special: Pokemon Change
The Pokemon Trainer calls Ivysaur back, instantly swapping into Charizard! This works as a fast air dodge and will be useful for getting into a more advantageous situation. You'll want to use this when you need better recovery tools or want to nab a kill. Even if you've used your double jump as Ivysaur, Charizard will be able to use his second double jump.
Hit: Intangible Frames 1-30, FAF 40.
Useful Info, Follow-Ups, Kill Percents, and Techniques
- Pokemon Change apparently refereshes ledge invincibility.
- [Example]
- [Example]
2.6: Defense
Shield: Frames
Parry Shield Drop: Frames
Shield Lock: Frames
Forward Roll: Frames
Spot Dodge: Intangibility:
Backward Roll: Invincibility:
Neutral Air Dodge: Invincibility:
Directional Air Dodge: Invincibility:
[Description of Defensive Options]
Useful Defensive Options, Techniques, and Tips
- [Example]
- [Example]
- [Example]
2.7: Movement
[Description of Character's Movement]
Useful Info and Techniques
- [Example]
- [Example]
- [Example]
2.8: Crouch
Crouching and Crawling are an incredibly underrated tools for improving your approach and evasion. [Character] can use their Crouch or Crawl to move under various attacks.
[Add hurtbox visualization to make this more effective.]
The uses of Crouch in each MU will be listed specifically in the MU section, but some examples include:
- [Example of Projectile]
- [Example of Aerial]
- [Example of Smash Attack]
Chapter 3: Charizard's Moveset

[Description of character's general moveset]
3.1: Normals
[Description of faster grounded options and the utility they bring to the character.]
Jab: Slash
A series of slashes with massive range and solid damage. Contesting this move is often a bad idea.
Jab 1: ?%, Frame 4-?, FAF ?.
Jab 2: ?%, Frame 4-?, FAF ?.
Jab 3: ?%, Frame 6-?, FAF ?.
Useful Info, Follow-Ups, Kill Percents, and Techniques
- [Example]
- [Example]
- [Example]
Dash Attack: Take Down
A huge smack with Charizard's body. No real combo potential, but great for pushing opponents away.
Hit: %, Frames 10-?, FAF ?.
Useful Info, Follow-Ups, Kill Percents, and Techniques
- [Example]
- [Example]
- [Example]
F-Tilt: Dragon Tail
A tail sweep with a solidly strong sweet spot. Bad if blocked.
Hit: %, Frames 12, FAF ?.
Useful Info, Follow-Ups, Kill Percents, and Techniques
- [Example]
- [Example]
- [Example]
U-Tilt: Steel Wing
A great anti-aerial and juggling tool. Mediocre horizontal range, but basically unbeatable vertically.
Hit: %, Frames 8-?, FAF ?.
Useful Info, Follow-Ups, Kill Percents, and Techniques
- [Example]
- [Example]
- [Example]
D-Tilt: Skull Bash
A headbutt along the ground. Best for stuffing out agressive approaches and landings.
Hit: %, Frames 9-?, FAF ?.
Useful Info, Follow-Ups, Kill Percents, and Techniques
- [Example]
- [Example]
- [Example]
3.2: Smashes
[General Description of Smash Attack Utility and What It Does For The Character]
F-Smash: Outrage
A massive swing of Charizard's neck that deals huge damage and knockback. Somewhat slow, but a very early kill move.
Hit: %, Frames 23-?, FAF ?.
Useful Info, Follow-Ups, Kill Percents, and Techniques
- [Example]
- [Example]
- [Example]
U-Smash: Wing Attack
A smack with both of Charizard's wings. A decently strong attack with good disjoints.
Hit: %, Frames 6-?, FAF ?.
Useful Info, Follow-Ups, Kill Percents, and Techniques
- [Example]
- [Example]
- [Example]
D-Smash: Earthquake
A huge, slow stomp that shakes the earth. Great for punishing in close quarters, but lacks the knockback of the other Smashes.
Hit: %, Frames ?, FAF ?.
Useful Info, Follow-Ups, Kill Percents, and Techniques
- [Example]
- [Example]
- [Example]
3.3: Throws
[Description of Character's Throw Game]
Grab
Standing Grab: Frame 8-9, FAF ?.
Dash Grab: Frame 8-9, FAF ?.
Pivot Grab: Frame ?, FAF ?.
Pummel: ?%, Frame ?.
Grab Release: FAF ?.
Useful Tips for Grabs and Pummels:
- [Example]
- [Example]
- [Example]
F-Throw: Strength
A great toss forward. Mainly used for sending the opponent offstage.
Hit: %, Frames .
Useful Info, Follow-Ups, Kill Percents, and Techniques
- [Example]
- [Example]
- [Example]
B-Throw: Submission
A hurl behind the back. Decently strong and likely a kill move at decent percents.
Hit: %, Frames .
Useful Info, Follow-Ups, Kill Percents, and Techniques
- [Example]
- [Example]
- [Example]
U-Throw: Seismic Toss
Charizard flies into the sky with the enemy and then sends them crashing back to earth for huge damage and knockback. A proper kill throw, boosted by platform height.
Hit: %, Frames .
Useful Info, Follow-Ups, Kill Percents, and Techniques
- [Example]
- [Example]
- [Example]
D-Throw: Heatwave
Charizard breathes fire onto the opponent and then rockets them forward. Likely his combo throw, potentially leading into U-Air, F-Air, or RAR B-Air when following DI.
Hit: %, Frames .
Useful Info, Follow-Ups, Kill Percents, and Techniques
- [Example]
- [Example]
- [Example]
3.4: Aerials
[Description of general aerial gameplay and how they benefit the character].
Neutral Aerial (N-Air): Flame Wheel
A huge spin in the air that knocks opponents away. No longer autocancels out of short hop.
Hit: 9.7%, Frames 8-?, FAF 39, Lag 13.
Useful Info, Follow-Ups, Kill Percents, and Techniques
- [Example]
- [Example]
- [Example]
Forward Aerial (F-Air): Dragon Claw
A very strong claw attack. Great for edge guarding and killing, but the lack of autocancel from short hop ultimately makes it risky in the neutral.
Hit: 13.6%, Frames 8-12, FAF ?, Lag 19.
Useful Info, Follow-Ups, Kill Percents, and Techniques
- [Example]
- [Example]
- [Example]
Back Aerial (B-Air): Facade
A huge bash with Charizard's flaming tail. A very long, very strong attack that can take kills early... especially when Rage is high.
Hit: 14.2%, Frames 14-16, FAF ?, Lag 20.
Useful Info, Follow-Ups, Kill Percents, and Techniques
- [Example]
- [Example]
- [Example]
Bair is very very good for combing and killing
Up Aerial (U-Air): Aerial Ace
A fast head smack in the air, good for pressuring landings and catching jumps.
Hit: %, Frames 10-?, FAF ?, 15.
Useful Info, Follow-Ups, Kill Percents, and Techniques
- [Example]
- [Example]
- [Example]
Down Aerial (D-Air): Mega Kick
A massive stomp downwards. The hitbox is huge and strong, making for a terrifying gimping option.
Hit: %, Frames 18-20, FAF ?, Lag 22.
Useful Info, Follow-Ups, Kill Percents, and Techniques
- [Example]
- [Example]
- [Example]
3.5: Specials
[General Description of Specials and how they improve the character]
Neutral Special: Flamethrower
[Description of N-Special. Add some flavor text to make this more interesting. Add hitbox visualization to make this very effective.]
Hit: %, Frames 20-?, FAF ?.
Useful Info, Follow-Ups, Kill Percents, and Techniques
- [Example]
- [Example]
- [Example]
Side Special: Flare Blitz
Charizard cloaks itself in fire and charges forward. This also damages the user for 6%. It's huge risk, huge reward.
Hit: 30.2%, 6% Recoil, Frames 23-?, FAF ?.
Useful Info, Follow-Ups, Kill Percents, and Techniques
- The knockback and damage on Flare Blitz is substantially buffed from Smash for Wii U. Landing this might actually land you the stock.
Up Special: Fly
[Description of U-Special. Add some flavor text to make this more interesting. Add hitbox visualization to make this very effective.]
Hit: %, Frames 9-?.
Useful Info, Follow-Ups, Kill Percents, and Techniques
- [Example]
- [Example]
- [Example]
Down Special: Pokemon Change
The Pokemon Trainer calls Charizard back, instantly swapping into Squirtle! This works as a fast air dodge and will be useful for getting into a more advantageous situation.
Hit: Intangible Frames 1-30, FAF 40.
Useful Info, Follow-Ups, Kill Percents, and Techniques
- [Example]
- [Example]
- [Example]
3.6: Defense
Shield: Frames
Parry Shield Drop: Frames
Shield Lock: Frames
Forward Roll: Frames
Spot Dodge: Intangibility:
Backward Roll: Invincibility:
Neutral Air Dodge: Invincibility:
Directional Air Dodge: Invincibility:
[Description of Defensive Options]
Useful Info, Follow-Ups, Kill Percents, and Techniques
- [Example]
- [Example]
- [Example]
3.7: Movement
[Description of Character's Movement]
Useful Info, Follow-Ups, Kill Percents, and Techniques
- [Example]
- [Example]
- [Example]
3.8: Crouch
Crouching and Crawling are an incredibly underrated tools for improving your approach and evasion. [Character] can use their Crouch or Crawl to move under various attacks.
[Add hurtbox visualization to make this more effective.]
The uses of Crouch in each MU will be listed specifically in the MU section, but some examples include:
- [Example of Projectile]
- [Example of Aerial]
- [Example of Smash Attack]
Chapter 4: Pokemon Trainer's Gameplay

Establishing Match Objectives is an important part of playing any character. At the given percents, keep these options in mind. Keep in mind that these aren’t the be-all and end-all things to do at these percent ranges. Newer players can take these options too strictly and become too focused on achieving these things... as opposed to playing all the ins and outs of the match.
Low Percent (0%- %):
- [Example of Goal at Given Percent]
Mid Percent (%-%):
- [Example of Goal at Given Percent]
High Percent (%-%):
- [Example of Goal at Given Percent]
4.1: The Neutral
The Neutral is a state of even, neutral advantage between characters. Typically, playing the neutral involves the act of hovering around the opponent’s “threat bubble” and fishing for “hit confirms” (safe, weak options that combo into much stronger attacks); it may also involve camping (via projectile or a comparable threat) to force the opponent into a disadvantageous approach. However, playing the Neutral isn’t as simple as repeatedly throwing out your best move or throwing projectiles from afar. It’s primarily about understanding what your opponent wants to do and finding ways to snag hits to take advantage of their attempts.
When hovering around your opponent’s threat bubble, “Whiff Punishing” is a huge part of shifting the neutral into your “Advantage State” and their “Disadvantage State”. Whiff Punishing involves baiting your opponents to attack with a predicted, laggy move right when you move out of their threat bubble... and then punishing them with a sufficiently fast attack.
- [Quick Descriptions of Character Options in Neutral]
- [Quick Descriptions of Character Options in Neutral]
A great way to punish bad neutral options is to take advantage of the opponent’s main focus. If they’re focusing on not getting hit while landing, they might try to jump again; as such, you can hit them with a harder option as they land after their double jump is expended. Similarly, if they’re trying to hide from your Aerials in their shield, feint an aerial and then grab their shield. Keep in mind, however, that sometimes, taking a mental note of a bad habit for later is better than punishing it immediately.
4.2: Advantage State
[Description of Agression and Options]
- [Quick Descriptions of Character Options in Advantage]
- [Quick Descriptions of Character Options in Advantage]
4.3: Bread and Butter Combos
Low Percent (0%-?%)
- ? > ? (?%)
Mid Percent (?%-?%)
- ? > ? (?%)
High Percent (?%-?%)
- ? > ? (?%)
4.4: Disadvantage
[Description of Disadvantage and Goals]
- [Quick Descriptions of Character Options in Disadvantage]
- [Quick Descriptions of Character Options in Disadvantage]
4.5: Ledge Dynamics
Ledge Trapping is the act of preventing a ledge-hanging opponent from safely transitioning back onto the main stage. Edge Guarding is the act of preventing an opponent from making a recovery from off of the stage. Learning how to play the ledge may be the hardest part of Smash Ultimate, as every get-up interaction involves the lighting-fast weighing of options and recollection of opponent habits. That being said, learning to play well at the Ledge can grant you a kill against most characters at most percent.
Ledge Trapping
- ?
Getting Ledge Trapped
- ?
Edge Guarding
- ?
Getting Edge Guarded
- ?
Other
- ?
4.6: Killing
Kill Confirms
- ?
Kill Mixups
- ?
4.7: Optimal Controls
Below is the control set that I believe to be optimal for the Nintendo Gamecube Controller in Smash Ultimate.
Attack: A, C-Stick
Special: B, L
Shield: R, D-Pad
Jump: Y, Z
Grab: X
[Explanation of Controls]
Chapter 3: Pokemon Trainer's Stage Selections
[General Description of Stage Preferences]
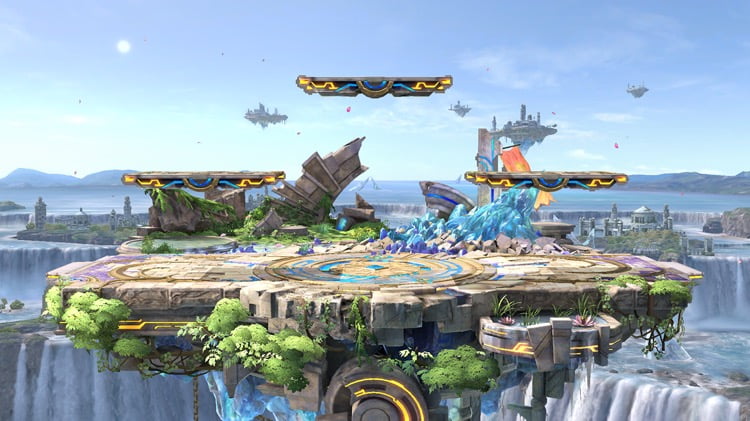
Battlefield
-
Neutral:
- ?
Advantage:
- ?
Disadvantage:
- ?
Ledge Dynamics:
- ?
Other Notes:
- ?
Pick Against:
- ?
Ban Against:
- ?
Final Destination
Neutral:
- ?
Advantage:
- ?
Disadvantage:
- ?
Ledge Dynamics:
- ?
Other Notes:
- ?
Pick Against:
- ?
Ban Against:
- ?
Lylat Cruise
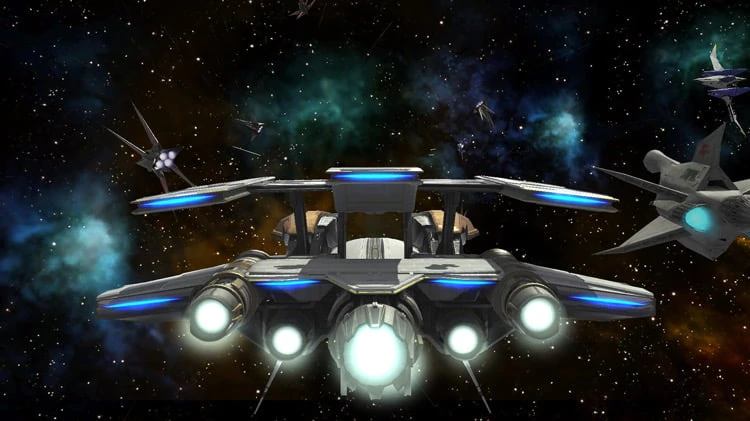
Neutral:
- ?
Advantage:
- ?
Disadvantage:
- ?
Ledge Dynamics:
- ?
Other Notes:
- ?
Pick Against:
- ?
Ban Against:
- ?
Smashville

Neutral:
- ?
Advantage:
- ?
Disadvantage:
- ?
Ledge Dynamics:
- ?
Other Notes:
- ?
Pick Against:
- ?
Ban Against:
- ?
Pokemon Stadium

Neutral:
- ?
Advantage:
- ?
Disadvantage:
- ?
Ledge Dynamics:
- ?
Other Notes:
- ?
Pick Against:
- ?
Ban Against:
- ?
Wario Ware

Neutral:
- ?
Advantage:
- ?
Disadvantage:
- ?
Ledge Dynamics:
- ?
Other Notes:
- ?
Pick Against:
- ?
Ban Against:
- ?
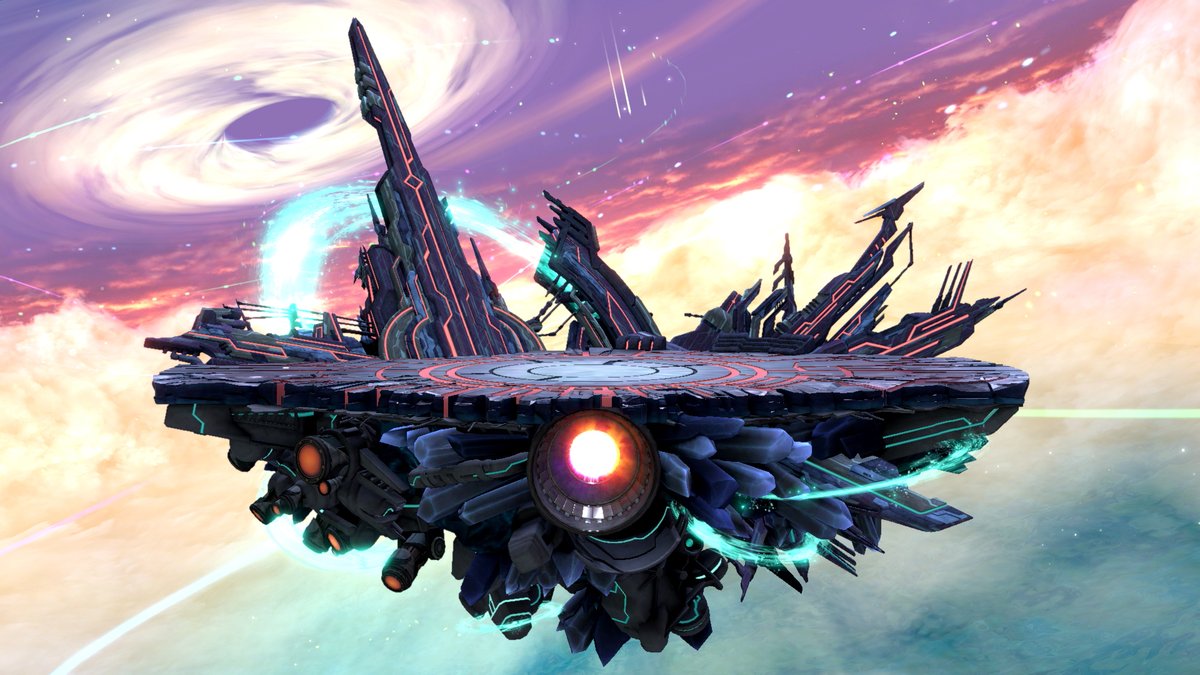
Skyloft
Neutral:
- ?
Advantage:
- ?
Disadvantage:
- ?
Ledge Dynamics:
- ?
Other Notes:
- ?
Pick Against:
- ?
Ban Against:
- ?
Arena Ferox
Neutral:
- ?
Advantage:
- ?
Disadvantage:
- ?
Ledge Dynamics:
- ?
Other Notes:
- ?
Pick Against:
- ?
Ban Against:
- ?
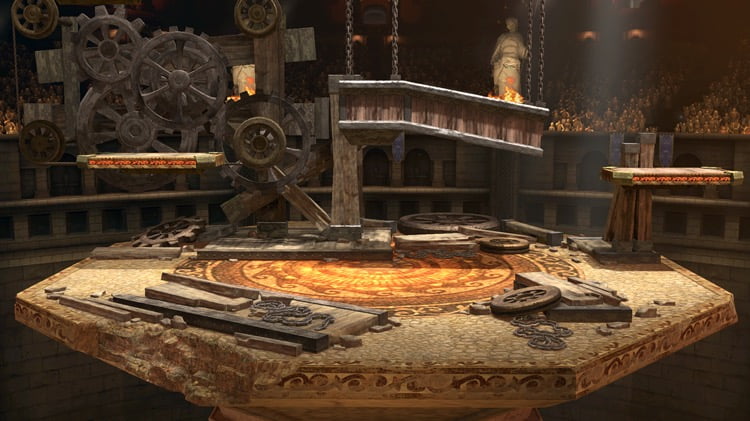
Castle Siege

Neutral:
- ?
Advantage:
- ?
Disadvantage:
- ?
Ledge Dynamics:
- ?
Other Notes:
- ?
Pick Against:
- ?
Ban Against:
- ?
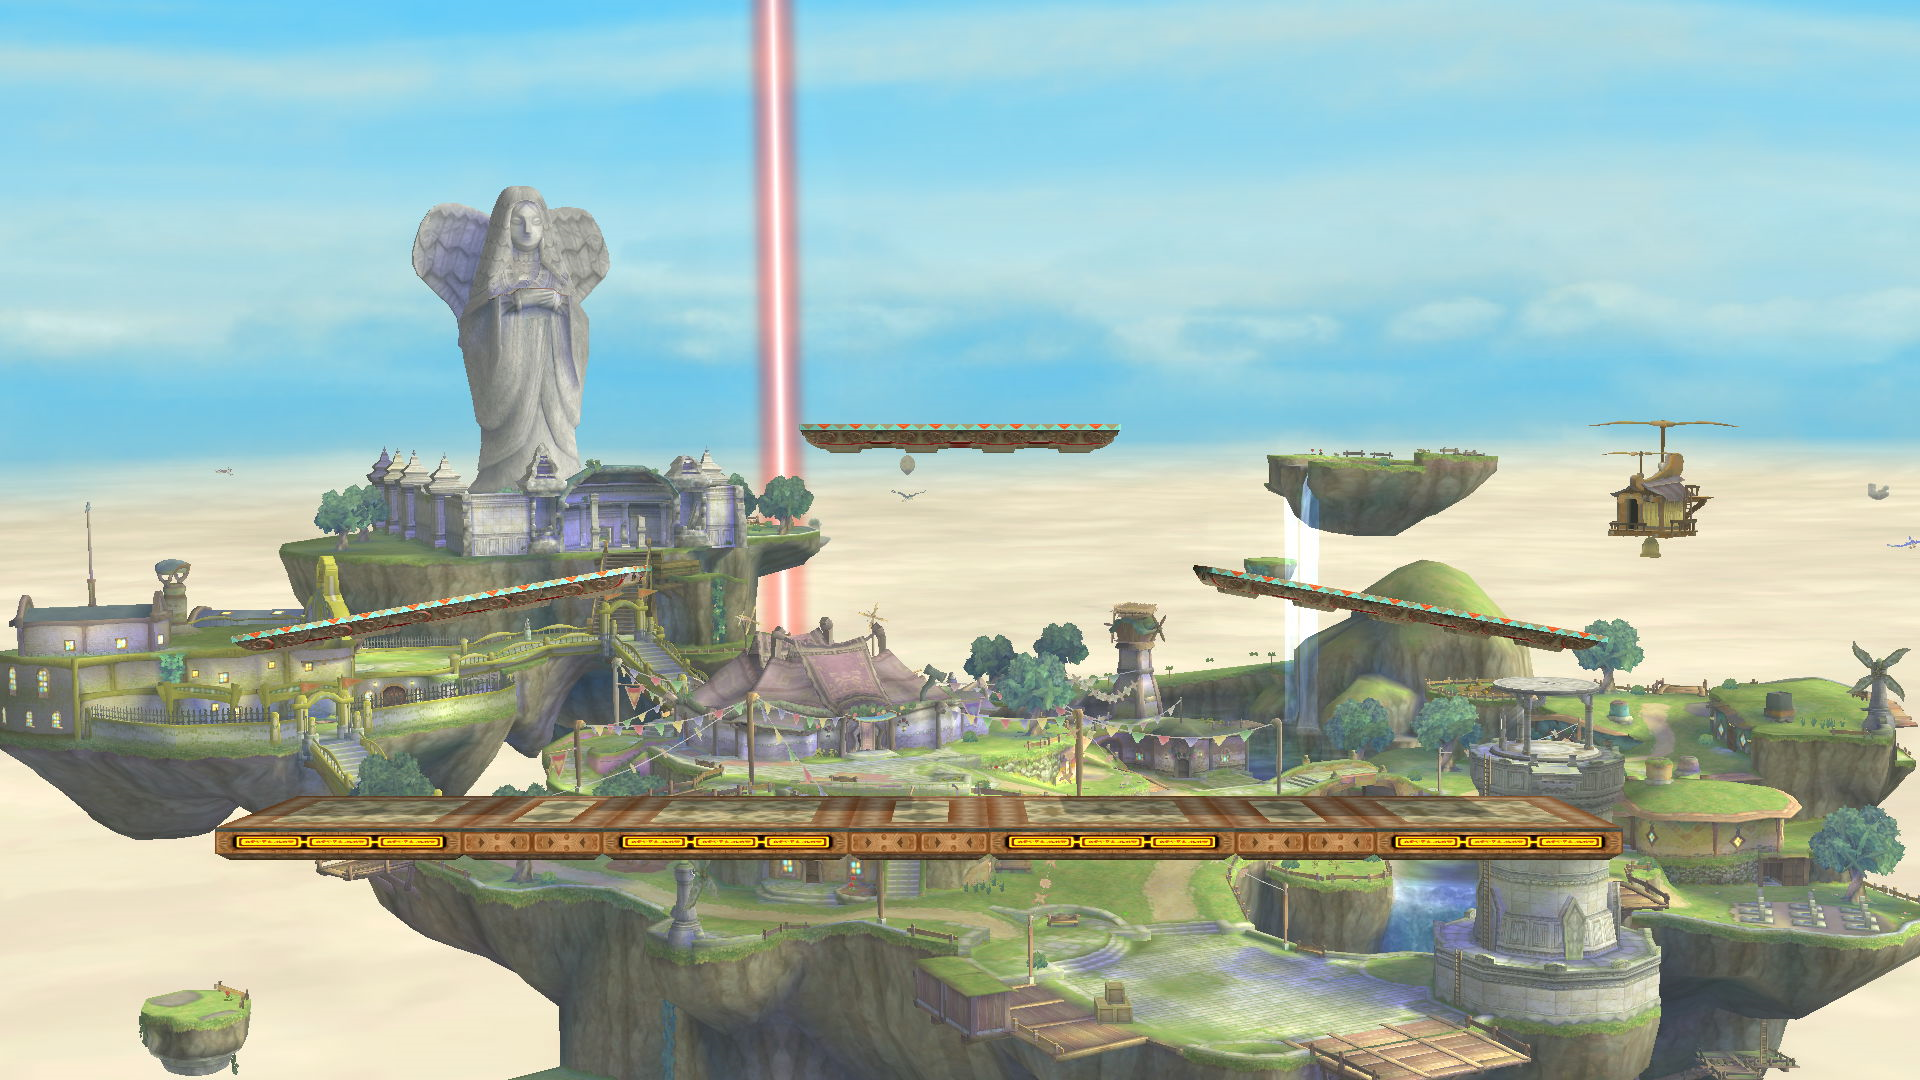
Town & City
Neutral:
- ?
Advantage:
- ?
Disadvantage:
- ?
Ledge Dynamics:
- ?
Other Notes:
- ?
Pick Against:
- ?
Ban Against:
- ?
Kalos Pokemon League

Neutral:
- ?
Advantage:
- ?
Disadvantage:
- ?
Ledge Dynamics:
- ?
Other Notes:
- ?
Pick Against:
- ?
Ban Against:
- ?
Frigate Orpheon

Neutral:
- ?
Advantage:
- ?
Disadvantage:
- ?
Ledge Dynamics:
- ?
Other Notes:
- ?
Pick Against:
- ?
Ban Against:
- ?
Chapter 4: Pokemon Trainer's Match-Ups
[MU Chart]
[General Description of MUs]
The ins and outs of each MU can be found here.
This blog post was written by a SSB World community member. Share your Smash 4 knowledge by creating your own blog post now.
Share your feedback:
You must log in to comment.